Pages

Showing posts with label jacket. Show all posts

Friday, December 14, 2012

Sewing A Blazer

Order of Operations

- Bulk Fuse self pieces (except sleeve - fuse hem only).

- Cut Self and Lining.

- Mark button/hole placement on fronts with basting sts.

- Stitch fronts, back, shoulder, under collar/stand, sleeves as unit.

- Apply sleeve head and shoulder pad.

- Stitch top collar/stand, front facing, back neck facing together as unit.

- Stitch facing unit to body unit, breaking at the notch. Grade, & clip SAs. Under-stitch front, collar & lapel.

- Sew Jacket Lining completely; Serge body seams, serge finish the sleeve seams separately. Leave one sleeve seam open.

- Stitch sleeve hem to lining hem.

- Stitch lining to facing.

- Reach through lining sleeve seam to stitch bottom hem. Close sleeve lining.

- Stitch button holes, sew on buttons.

It should go without saying that one must press as you go.

Most Helpful Links:

- Sewing a notched collar: Threads This is not the method I use, but it looks pretty good. I should probably blog my method since I haven't found it's equivalent.

- Bagging a lining: Grainline , and Threads
  - Sleeve Vent: Pattern Scissors Cloth, Sigrid

Wednesday, November 28, 2012

Drafting a Personal Fit Jacket – aka Pattermakers Block


I have been taking a patternmaking course at FIT this fall specializing in jackets and coats. Every week, we practice drafting the jacket block for a standard size 8 and learn how to create different jacket styles by changing the style lines. The class is from a production point of view, so there are lots of patternmaking details, tricks and methods to remember that will help make the construction more efficient and how and wear to adjust the fit when making pattern corrections. It’s been great. The weekly practice of drafting the block has finally sunk in and I sewing up the half muslin in less time each week. Practice makes better!

So now I’m starting to work on my final project and I have immediately run into a BIG problem. The final has to be of our own design, include the complete production pattern (w/ separate lining pieces, fusible, and templates) AND be accompanied by a full garment sample (we are allowed to employ a sample maker if we like). It’s also due in exactly two weeks. The amount of time and the scope of the project isn’t the problem. The problem is that we are allowed to use our own measurements for once, and of course if I’m going to go to all that effort I want to make the final sample wearable for myself.

Why is this a problem? Because I have a massive bust circumference (43”) and I carry a large portion of it on the front half of my torso. My front bust circ is 5” larger than my back. When we draft a block for jackets we place the side seam directly in the middle, which would make the back too big and the front too small, and give my a badly shaped back armhole to boot. This was never a problem as long as I was drafting for a size 8 (which apparently my back is). I am stumped on how to proceed and time is ticking away. Do I move the side seam closer to the back? Or do I draft the block based on my upper bust measurement and then adjust the bust as I would the hips when I add in my princess seam style lines? The later is closer to what I do with commercial patterns, but is a bit of a work around and defies the concept of drafting from scratch. I feel that there must be a right way of drafting this particular fit problem.

I was hoping my boss would be in the office today (he's also my professor - gotta love FIT) so I could pop into his office and ask him for 2 minutes of advice but unfortunately he is not here today, which means I am wasting another day that I could be working on the final.

Tuesday, September 25, 2012

Chanel Jacket: Part 4: New Muslin, Quilting Prep


I cut and fit the new muslin last week. This time I make a size 16. I ended up making the same FBA to the front by adding 3/8” to the front princess seam allowances from hem and then blending in to the seam just above the bust curve. It fits just fine. I don't have a pic at the moment though.

This weekend I fit the sleeve. It was tight across the bicep and didn’t have much movement. I checked the measurement and noticed that the bicep measurement on the pattern piece (15 1/8”) is not correct. The bicep actually measured 14 ¾”, so there’s that. My bicep is 13 ½” but 2” ease is the suggested minimum (according to my Jacket’s & Suits patternmaking professor). Also worth noting: the “step” on the elbow seam of the upper sleeve is too low. I corrected it by matching the dots and redrawing the step. BTW, the step is used in production patterns to line up the top of the elbow seam. Both sleeve pieces should have steps on the top of the elbow seam that match perfectly so that you can line up the first part of the seam easily. The dots aren’t even necessary with a correct step, but I digress. I had been contemplating just going with the 2 piece sleeve but since I’d have to adjust it to fit anyway I figured I might as well make it into a 3 piece sleeve; more on that later.


Since I have the new Clair Schaeffer pattern I decided to trace the 3 piece sleeve onto muslin and give it a try. It has more room in the bicep but there is a LOT of sleeve cap ease; too much for the body. I suppose it could be the fact that it doesn’t really belong to the pattern body, but I wouldn’t know unless I muslin that body which I am not going to do at this time. The interesting thing about this sleeve is that all three pieces are quite curved. When the constructed sleeve is laid on a table it doesn’t lie flat and the wrist pops up. Basically the sleeve is shaped to mimic the way our arms naturally curve forward and inward. The curve of the outer seam is so pronounces that I think it makes the arm looks very rounded, which I don’t like. I want slim looking arms please! I think the “odd” grain-line on the front sleeve is intentional to get the grain to appear straight on the front of at the shoulder and especially at the third seam, but the curve kind makes this a moot point. I think it was worth trying and I wouldn’t write it off if I were to make the Claire Schaeffer pattern later.


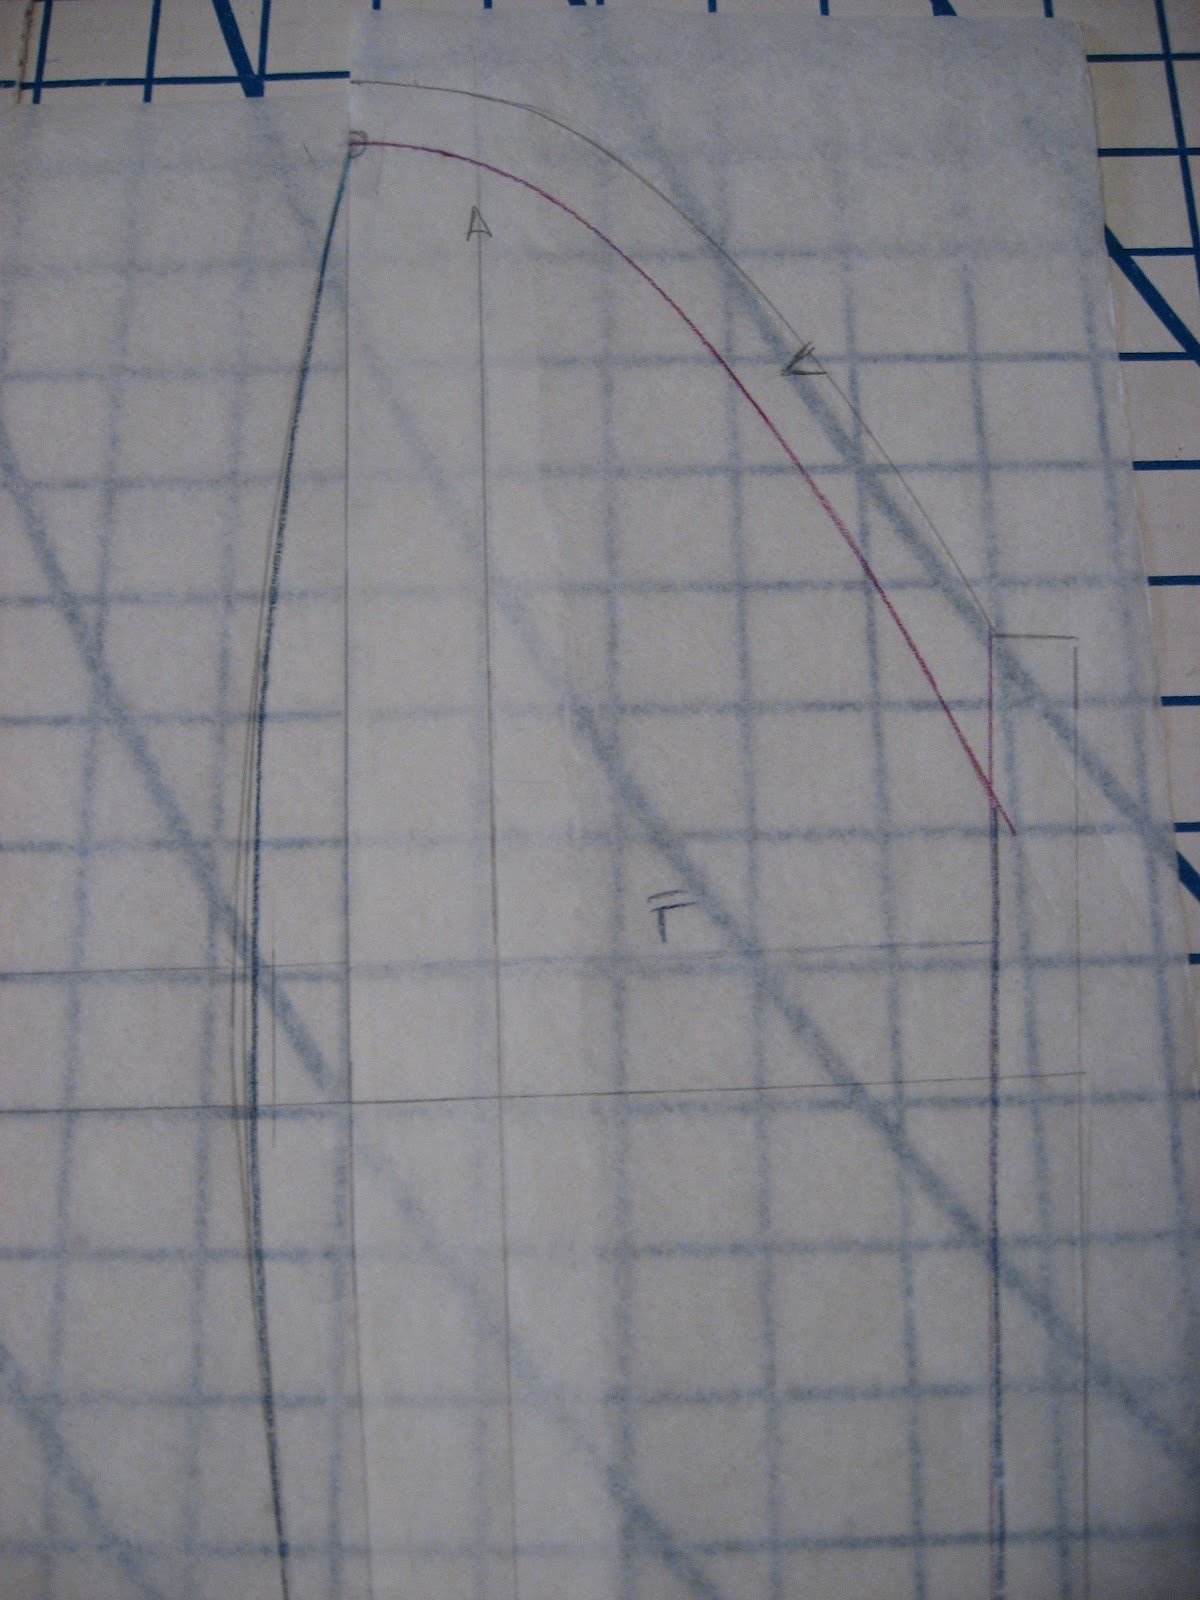
So back to original 2 piece sleeve which I transformed into a 3 piece and increased the bicep approximately 1 ½” total. To do this first marked the bicep line and then I split the upper sleeve in half vertically (parallel to the grain-line) from the shoulder seam notch and then gently curved the line toward the front below the elbow so that it bisected the wrist in the middle. I taped each half to some extra paper and then added 5/8”~3/4” at each bicep point and used my hip curve to blend into the shoulder point and wrist. Then I added the canted sleeve vent under-lap on the back piece. I haven’t yet, but before I cut the fashion fabric I will cut muslins of this new sleeve and to check the fit once again.


In the meantime, I’m preparing the body panels for quilting. This involves 1) thread tracing the pattern piece using a single strand of red dmc embroidery thread; 2) placing a silk organza armhole stay under the side front and back panels; cutting a square of silk jacquard lining and pinning it to the underside of each panel being careful to preserve the grain-line of all pieces. I got all 4 armhole panels completed last night so I think I should be able to do the center back and center fronts tonight. Then I will move onto the quilting phase!


I am super excited about the quilting part. It means I will finally get to justify my walking foot purchase (although I already used in on a mini quilt) and I’ll get to see how the hand of the fabric changes when the lining layer is added.


I also got out my trim again and started looking at it on top of some pieces of bias that I cut. It makes me very excited about this project!! I’m trying to be cool about it though. I don’t want any perceived setbacks to ruin the rhythm I’ve got going on.

Friday, September 14, 2012

Update: I've been busy


Just checking in for an update. No time for pics, just details:

Slow Sewing:
I managed to finish my Alabama Chanin green tunic/tank and a plain grey corset tank. I made everything in the XL size, and I think they may be a bit too loose for plain and moderately embroidered styles. Next time I think I need to take at least ½” off the back shoulders because the seam very forward on my shoulders (my back is kinda flat, my front is not so much) as well as raise the front neckline 1”. In the pipeline for the Alabama Chanin slow sewing is a blue sleeveless bolero and a pink retro panty and bustier set (burdastyle pattern). After a fruitless search of the interweb I ordered a yard of the pennant felt from Alabama Chanin which is slated to become a Paisley stencil and an Angie’s Fall stencil. I also bought a craft airbrush. 

Sew-Sew Summer:
I made a few dresses this summer to varying degrees of satisfaction. Hazel, which has a weirdly shaped facing (size 12 - am I the only one?) does not flatter me but the fabric is awesome and I wear it anyway. I also made a Tiered Maxi dress with that burdastyle pattern that is so popular. The fabric is a delicious Italian cotton floral, but without trim looks a bit like a nightgown. Also, the side zipper itches my tender flesh and is kinda unnecessary since I can pull the dress on over my head. I need to pick the zip out but the side seams will be different which bugs me. I want to make another version; short, no zip from a rayon challis floral with some wee trim at each tier. I cut a BS Fatima dress, but the fabric is noisy so I’ve lost interest half way through sewing it. I also cut a long striped jersey maxi dress but I need to take it in at the side seams (damn Big4 sizing again!) and it’s tricky to get the stripes to match up the 2nd and third time I stitch the side seams.

Chanel Jacket Update!
I attended a 90 minute “class” at Mood NYC this week with Susan Khalje where she went over the methods employed in making a classic french cardigan jacket. The class was very informative but I didn’t learn a whole lot of new information. I did find it helpful to go over everything in detail with a master couturier and I immediately got my Chanel jacket mojo back after seeing several ladies try on Susan’s famous samples. I brought both of my patterns to the class and Susan mentioned that she prefers the v7975 pattern to the newer v8804 pattern due to the built in shaping in the pattern. She said it is possible to convert a 2 piece sleeve into a 3 piece by splitting the upper sleeve vertically from the shoulder notch. She also discussed the dimensions and shape of the canted sleeve vent. Also worth noting; Susan uses silk organza to interline the top portion of the side front and back panels in order to stabilize the armholes. Overall I felt encouraged that the techniques employed, although labor intensive, are not terribly hard or complicated. No need to over think it. I confess, the pattern instructions in v8804 intimidated me with its specificity and additional construction techniques.

ETA: I found an AMAZING flicker set for the new Vogue pattern 8804. It makes me want to give that pattern a muslin. I think the sleeve is intriguing. Much of the online discussion about this pattern has been in regard to the "strange" grainline of the front top sleeve pattern piece however Claire Schaeffer herself weighs in on the subject in this flicker set!

Moving onward; last night I decided to remake my muslin in a larger size (16) using more traditional couture methods which I learned from Susan’s Craftsy couture dress class. One tip I will share is how I was able to easily transfer the pattern to the muslin. I have a Clover tracing wheel that has two adjustable wheels. The wheels are blunt so they don’t pierce or otherwise damage the tissue pattern. I set up the wheels 5/8” apart so that as I traced along the cutting line with the outer wheel the inner wheel traced the all important stitching line. This made it possible to skip drawing the cutting lines onto each pattern piece. I’m going to fit the sleeve as a two piece but I will draw the vertical seam line on it so I can check the placement.

Confession: I also bought a black tweedy boucle, complimentary silk charmeuse and thread for a 2nd Chanel jacket for fall. I will need to find appropriate trims later.

Knitting:
I participated in the Ravelympics, no wait, EXCUSE me, the Ravellenic Games. I did not medal (drat!) but I did finish my sweater. I love it, but I have no acceptable photos for the blog. Ravelers can check it out on ravelry.

I impulsively started a traditional aran fisherman sweater (stash busting, I swear) and I am already on the 2nd sleeve. It’s interesting and easy enough; great for tv knitting and commuting.

I need to cast on for me wedding shawl (to say nothing of my DRESS) but I am distracted by my current intarsia obsession. It’s all Kafe Fassett's fault. I found a 2nd hand copy of Glorious Knits and I am dying to make a carpet patterned (kilim inspired) cardigan jacket for fall. I’m going to Lion Brand Yarn Studio this evening for an event. I might end up purchasing a sweater worth of Amazing. If I do, it’s allowed because I finished my Ravellenic sweater with stash yarn and my current sweater is also stash yarn.

Studies:
I got an A in Patternmaking II. Hurrah! I am now enrolled in Patternmaking Jackets and Suits for the Fall semester at FIT. Learning to fit a jacket is supper helpful for work and especially for the Chanel jacket project. I am much more confident about fitting the new muslin. Two of the important things that I've learned so far are: 1) the Shoulder Slope is critical to the overall fit of the jacket, and 2) the Collar Sweep (outer edge of the collar) is critical to the shape and break of the lapel. If the collar sweep is too long, the lapel will break too high, if the sweep is too short, the lapel will break too low.

Saturday, July 30, 2011

Chanel Jacket: Part 2: Muslin Making

I am currently knee deep in my Chanel Jacket Muslin fitting.

Recap: Pattern: V7975, short version with no overlap.

Initial Pattern Issue: This pattern does not have the 3 piece sleeve that I want and none of the other patterns with a 3 piece sleeve are in print. I even enlarged the diagram from the Great Sewn Clothes book and printed it out to scale to see what I could glean about the fit and attempted to redraft a sleeve for my pattern taking these details into consideration.  I was obsessing a bit much about it so I asked my sewist friend Sara of and Sparrows and Honey Bees for her advice. She assured me that I 3/4 length 2 piece sleeve would be fine and appropriate for a summer jacket. I'm still thinking about it, but I'm probably going to take her word for it and keep working on the sleeve pattern puzzle for a wool boucle winter version.


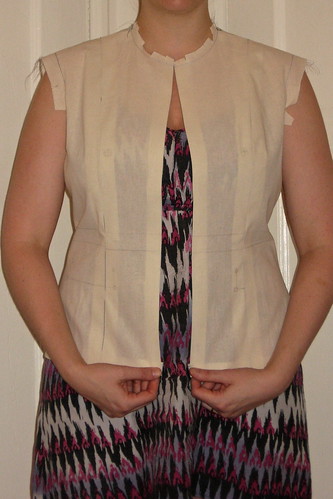
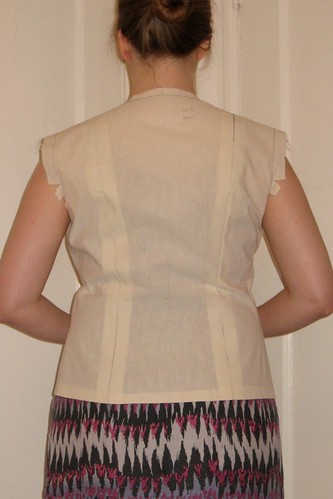
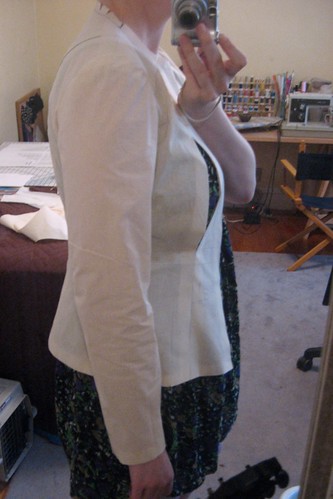
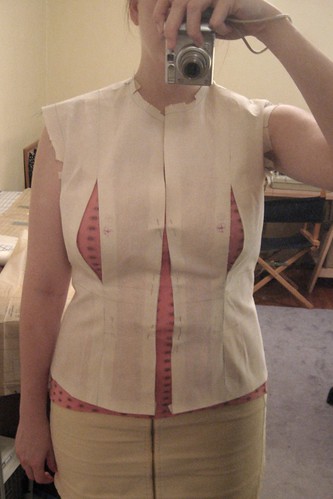
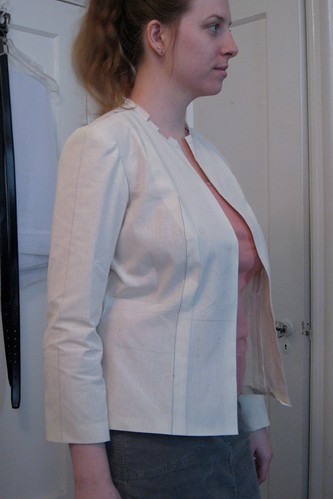
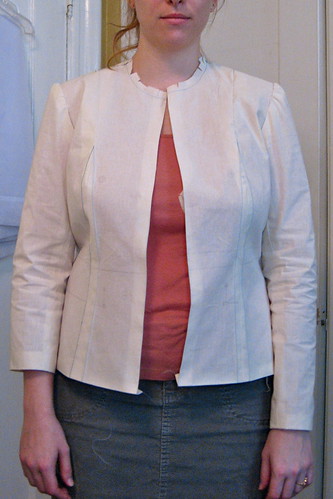
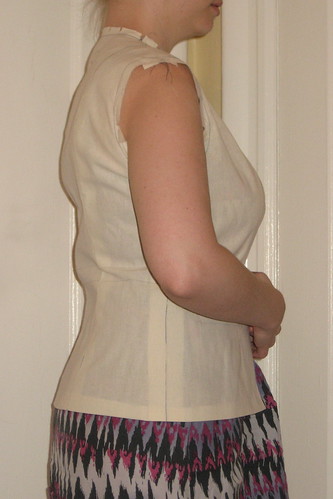
 Muslin #1: Like a good little apprentice couturier, I made a muslin. I started with size 14 according to my high bust and I knew I would need to lengthen it so I added 1” to the bodice and sleeves prior to cutting the muslin. According to my research the classic Chanel jacket has very high armholes, so I also raised the armholes 1 inch (but traced out the original armholes for comparison) and only inserted one sleeve. I sewed it up with 1" seam allowances and tried it on. The armhole fit is good although the bicep may be a tiny bit snug (still contemplating that). I'm happy with the way the back fits. The one issue I have is with the front. Obviously, I need a FBA.


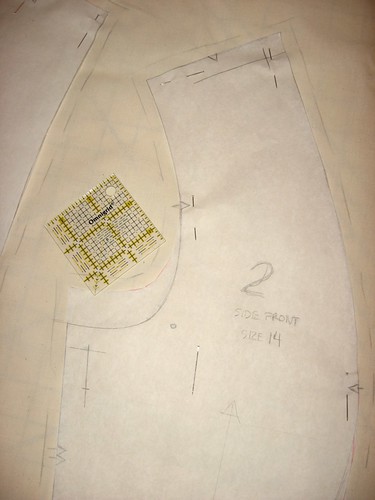
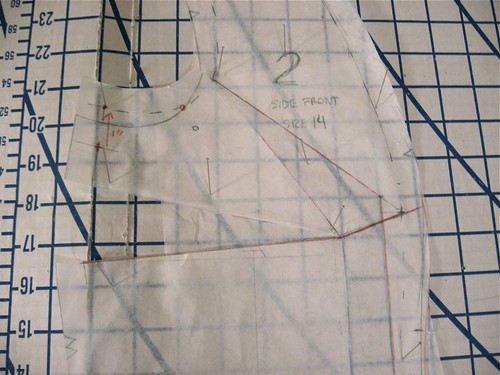
Muslin #2 I followed Fit For Real People’s approach to the princess seam FBA. FFRP offers 3 options for FBA on the princess seam: adjust the front piece, adjust the side front piece, or if the adjustment is very minor one can just add to the princess seams. For larger adjustments (ahem DD over here) FFRP has you choose based on the how far apart or close together ones bust apex is. The idea being that the princess seam should fall on the apex. My bosoms must be pretty well centered because they were already on the princess seam (minus the 1” FBA needed). Unlike Erica Bunker. who adjusted the front piece, I opted to modify the side front piece. I spread the bust 1” for my DDs. I was rather proud of my pattern modification and re-cut a side front and front muslin piece and attached them to the half of my muslin that did not have a sleeve.


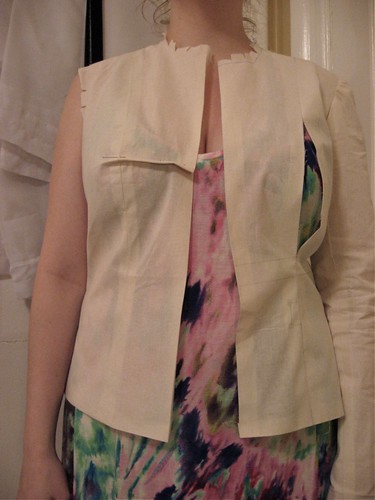
Result: the front piece is WAY TOO LONG, causing the CF to hang down and out.  Because I spread my side front 1" I ended up adding 1 ½” length to the front piece which caused the front edge to hang down and swing away, and caused the CF to look curved rather than straight. Bummer.

Problem solving: I pinched out 1” at the CF and tried to determine how to adjust the front piece to reduce the front edge length only but I was stumped. FFRP does not address the princess droop for an open jacket. It only offers a solution for a dress which is to hack off any excess length at the bottom of the front panel, which is an inelegant solution (IMHO) that would not work for me here. I though real hard and as the hour of my bedtime drew nigh I began to fear going to sleep frustrated. In a moment of desperation I undid the princess seam on the other half of the muslin that had the original pattern and let out my seam allowances (1” muslin seam allowances are a MUST folks!) so that my remaining SA was ½” from the hem to the bust point and then tapered into the original seam. It worked. I had my 1” added width and My CF edge is straight. My hem is straight(ish) This FBA is way easier than the FFRP version.
I think I'm going to let out the side seams below the waist about 1/8" and pinch in a bit of the front princess seams above the bust before I finalize my pattern revisions. I'm also still trying to decide about the sleeve length.... 3/4 length or long sleeve. My BF likes the long, but as a summer jacket a 3/4 length would be just fine and I could always make this again as a winter jacket with a black wool boucle and long sleeves. I still want to try to figure out the 3 piece sleeve pattern (or find a copy of the Sandra Betzina pattern). 

Thoughts on my progress so far are welcome!

Saturday, July 23, 2011

Chanel Jacket: Part 1: Dreaming & Scheming

Let’s pretend that I haven’t neglected my blog for months, and jump straight into my current project obsession: the Chanel Jacket.


There are a great many sources of inspiration and information that have helped fan the flames of my desire:

- There is the Go Chanel or Go Home blog, to which I hoped to become a member so that I can add my own pattern alteration experience to this archive.

- Threads Magazine issue121 from 2005, the "Inside a Chanel Jacket" article by Susan Khalje has invaluable information (I had to call Tauton press to order a back issue since they appear OOP when the quantity drops below 20). **hint** One might be able to find pics online of the article if one is clever.

- Book: Great Sewn Clothes (from Threads) - covers the Chanel jacket construction details and includes a handy diagram of a Chanel jacket pattern.

- Book: Couture Sewing Techniques by Claire B Shaeffer, has much the same info as the Threads book, but goes into greater depths about many couture techniques.

- The amazing Signe Chanel documentary…. Especially the section on the braid maker.

- The runway show archives at style.com.

- Ebay… real Chanel jackets for resale often come with great detail pictures!

- Erica Bunker’s version of the Chanel jacket comes up quickly in a google image search. Erica’s blog is my go to whenever I start a new vogue pattern because she makes many of the same pattern alterations that I do and to the same pattern size.

- Marina is the couture blogger for Burdastyle and Frabjous Couture, took an in depth Chanel Jacket sewing course with Susan Khalje and shared many details from the class on her blog.

- You know that feeling you get at a store…"I could make that for way less!” I even had that thought in the CHANEL store in Soho. I tried not to look like I was dissecting the garments while I admired the lovely trim and buttons, but you know I was.


So, of course I have launched my own Chanel jacket project.

My Chanel Jacket:
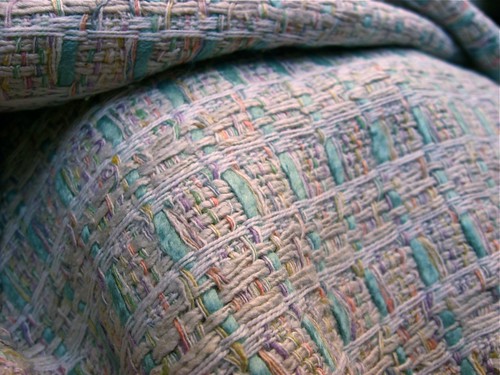
Fashion Fabric: Silk boucle from Chic Fabrics on 39th between 7th and 8th.


I think I got this fabric for $6/yard... I only spent $40 total on fabric, and the lining was pricier than the boucle. Lining Fabric: Silk jacquard lining (also from Chic Fabrics) for $10/yard. This will be a summer jacket.


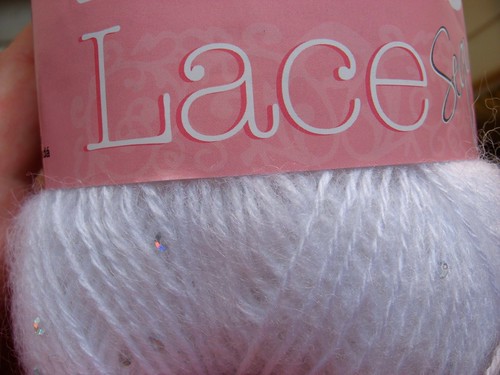
Trim: I intend to make a fancy braid with threads from the boucle I will also use a selvage or bias cut fringe as a base and I bought some nifty lace weight yarn from Patons that has a bit of sequins in it to include with the braid for a touch of glitz.


Pattern: V7975, short version with no overlap.

Pattern Issue: This pattern does not have a 3 piece sleeve. I WANT a 3 piece sleeve. None of the other patterns with a 3 piece sleeve are in print. I even enlarged the diagram from the Great Sewn Clothes book and printed it out to scale to see what I could glean about the fit and attempted to redraft a sleeve for my pattern taking these details into consideration.  My obsessing about the darn sleeve is a bit of a sticking point but I really want to get going on this project.  I may just keep working on the sleeve pattern puzzle for a wool boucle winter version and stick with a 3/4 length sleeve for this summery version.

Wednesday, January 6, 2010

Happy New Year! (Vogue 2984)


AK Jacket Front
Originally uploaded by wzrdreams
Picking up some OJ on the way to New Years Brunch.

Vogue 2984 - Klein Jacket pattern. Self lined, shawl collar wrap jacket with slit pockets and back/side peplum.

The pattern ran small, but I read up on it on patternreview.com before hand so I was prepared and cut a jacket 2 sizes larger than I would have otherwise. I also make the armhole slightly bigger at the suggestion of a previous pattern reviewer and my pattern maker (I work for ladies suit company as a tech designer and using the cutting tables is my favorite job perk), who happened to walk by while I was cutting this out. He suggested that I trim the armhole 1/4" and then sew the armhole seam at 3/8" instead of the prescribed 5/8". I took his advice and am quite satisfied with the fit of the armhole.

It’s completely self lined, which makes it very warm, but one thing I would do differently is change the sleeve lining to a thinner material, the double layer of wool gets bulky in there. This was also the project that I learned you should preshrink even your woolen fabrics. Steam press!

Related Posts Plugin for WordPress, Blogger...