Pages

Showing posts with label design. Show all posts

Sunday, August 11, 2013

10 Things to Know About Making My Own Wedding Dress (WITH PHOTOS!)

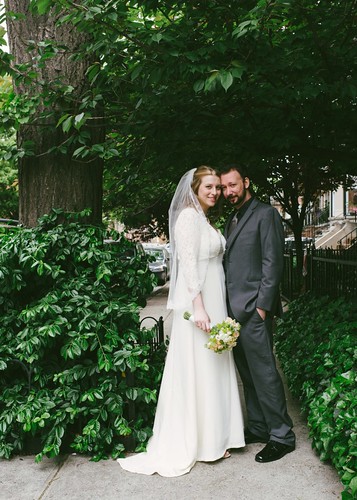
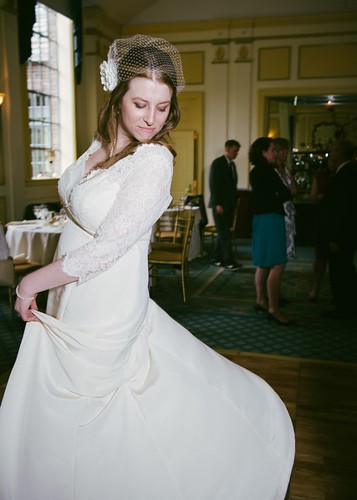
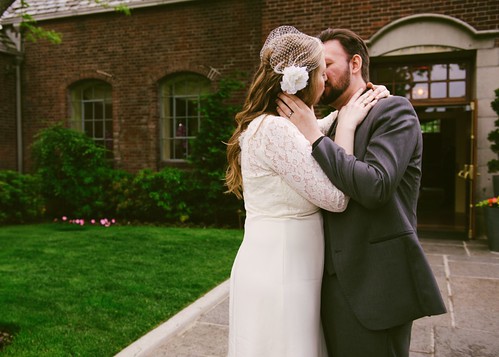
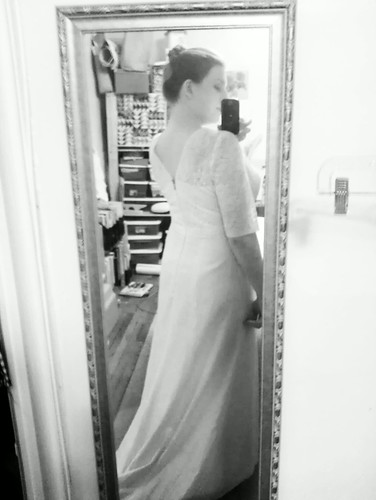
Recently I got married. What that really mean is, I recently had an excuse to make an epic dress for myself. YES,  I MADE MY OWN WEDDING DRESS!  And here are 10 things you might like to know about it.... 


1) Shopping for and trying on RTW gowns was a good idea.

Along with my sister and my MIL, I brought two level headed friends who know me and my personal style well. I tried on 5 dresses at Kleinfelds with the help of their wonderful sales associates and was able to determine which silhouettes looked best on me and I got an idea of what dresses in my “budget” looked like. (The “budget” was 6 times what I planned to spend on materials) This helped keep things in perspective later as I decided on a pattern and purchased materials.

2) I couldn’t commit to making my dress and going to the gym every day.

I decided that having a dress that fits me perfectly was a more reasonable goal than trying to lose 15 lbs and squeeze my chest into a ready made gown. I wish I’d realized this sooner because I would have started making the muslins a lot sooner as well!

3) The design process took a lot longer than expected.

I had a lot of design inspiration and a stack of commercial patterns to choose from. I knew that I wanted a slim skirt with a puddle train, long or ¾ length sleeves and as much lace as I could afford (not much). Originally I thought would combine design details from several patterns but the early muslins where not encouraging. After making muslins for 3 different patterns I was getting a little nervous because I didn’t know what my dress would actually look like. Then at what seemed like the last minute I found a new dress pattern by Simplicity (1909) that pretty much nailed my requirements and I wouldn’t have to change the design at all. I paid full price for the pattern and got right to work cutting a muslin with substitute lace and everything.

4) It helped to have a sewing-savvy friend to be a technical consultant.

My friend Sara is a recent Parsons grad and a knitting buddy. She comes over weekly for TV and wine so she was the perfect person to help me with the fine tuning of the pattern fit and to go with me to try on commercial dresses. She knew precisely what I was going for in style and fit and she knows quite a bit about sewing. It was immensely helpful to have her check in and see the dress progress on a near weekly basis. My coworker Julisa was also able to provide similar advice when needed. I work in the fashion industry as a technical designer and I did most of my pattern corrections and all of my fabric cutting at work on the large cutting tables. Julisa was often there to confirm my layout and cutting methods as well as help fit some of my first muslins.

5) I kept is simple (as much as possible).

I wisely picked a design that would not be a too complicated. It was a fitted but not overly structured design well within my experience level. I think the pattern choice was perfect. I researched couture sewing methods, but I wasn’t afraid to take make time saving choices about construction. There was one point when I started to make it into more of science project than necessary…While shopping for organza at Mood I ran into a coworker who was a contestant in Project Runway Season 10 and specializes in evening gowns. I told him about my plans briefly and asked him if he had any advice. He said something along the lines of “The foundation is everything! Use sew-through boning on your foundation!” Well, a corselet was not an original part of the pattern design, but Susan Khalje and half the wedding dress sewing blog-averse made them so I went ahead and purchased sturdy cotton muslin and all the boning and hook/eye tape I would need, but in the end I didn’t love the restricting fit and it was causing a bit of construction order confusion. Another friend asked if a corselet was truly necessary and wisely suggested that I leave it out in favor of good foundation garments. I took her advice and it got me back on track.

6) DIY Accountability.

While I was working on the actual sewing, I instagrammed pictures on my cell-phone and posted them on Twitter (@restlessgrace) and Facebook. This prevented a lot of repetitive stressful questions about progress and it also garnered a lot of positive feedback and encouragement from friends and family. One of my twitter friends (@FleurHoare) regularly re-tweeted my posts which gave me a boost of confidence and pride. My coordinator Shanelle checked in with me periodically to monitor my wedding planning progress. I could tell she was a little concerned that I was making my own dress, but she was fully supportive and kept me focused on all the wedding details.

7) Making the dress was stressful.

For the last 3 months I almost couldn’t think about anything other than the dress. It was the last thing I though about at night and the first thing I thought about when I woke up. Every wedding nightmare that I had was about the dress not being finished or looking like a hot mess. That it was stressful isn’t really a surprise, but it was something I was in denial about the entire time. I kept a tight grip on my confidence and miraculously I never faltered. I did secretly worry that it would be completed mere hours before the wedding and that it would be a wretched train wreck, but I think having perfected muslin that I could try on anytime that I felt my confidence flag was my saving grace.


I love this muslin!

8) Timing is super important.

I thought that my 10 weeks estimate was a generous amount of time in which to complete it, but I gave myself 14 weeks just to be safe. I finished the dress just 7 days before my wedding! I should have been more disciplined about sticking to my dress making schedule (see above: stress), but since I gave myself a few weeks extra I made it in just under the wire.

9) I saved money making my dress.

Having control of my materials meant I could have a gown in whatever price range I was comfortable with. I kept a spread sheet of my purchases to keep an eye on the mounting cost of the dress. I’m going to be open; I bought $757 worth of materials (including the veil and fascinator materials), but the materials that I actually used in the dress totaled $449. Bottom line; I made a gorgeous silk dress that fits me perfectly for the bargain price of $608 (factoring all dress materials purchased) and a beautiful veil and fascinator that cost $148. For comparison, all the dresses that I tried on were in the $1600~$4000 range (before fitting). There are a lot of materials left over that I definitely will use as well. With the extra silk and lace I plan to make some luxurious lingerie.

10) It was all totally worth it.

Making The Dress was the most satisfying part of planning my wedding. The day of the wedding went by in a fast blur, but I will remember making the dress for a very long time.

Going to Church
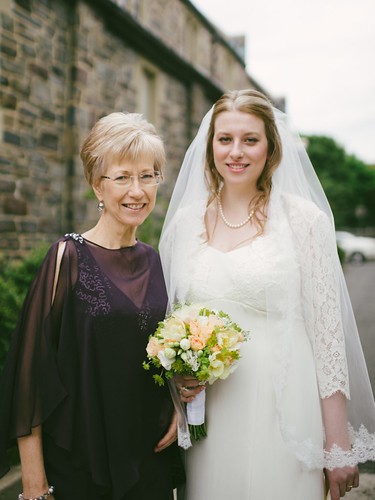
My mom looked so lovely.
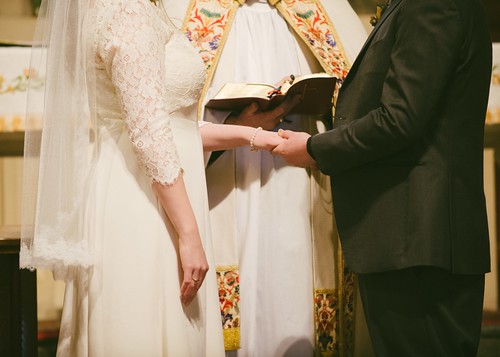
We memorized our vows!
Borrowed my BF's pearl necklace
3 bustle points - ribbons inside

less structure = more dancing!

Love

Bonus Fancy Dress Making Tips: 

1. Practice everything, even if you’ve done it before. You want to know what the results will be like this time before you commit to each process.

2. Material is precious and expensive; protect your investment: Do not let anyone else touch your fabric/project. No one knows the financial and emotional investment better than you and no one will take as much care with your fabric as you. Clean your sewing room and don’t bring the dress outside the room!

3. You risk marring your fabric with excessive handling. When using silk crepe, test press a square of your silk with dry heat to see if it shrinks. If it doesn’t, consider skipping a pre press.

4. Press well and often. This is no time to skimp. Cover your ironing board with clean muslin. Better yet, also cover the ironing board legs with clean muslin. If your organza press cloth somehow got fusible glue on it from a previous project, don’t use it! Test the heat setting so that you don’t get seam impressions.

5. Sewing hook and eye tape is easy! There is a great tutorial here.

6. Just because Susan Khalje does it in her couture wedding dress book doesn’t mean you have to. In other words, a corselet is not necessary if the dress is not strapless and doesn’t have a heavy skirt.

7. Stay organized. Keep all your notions together, eliminate extra stuff on your sewing table, and keep all the muslins together and all the pattern pieces together. I spent an hour hunting for my modified pattern pieces one night, terrified that I’d thrown them out.

Extra: My wedding pinterest board with all my wedding inspiration pins.

Stay tuned for the epic wedding dress making detail post!

Tuesday, February 19, 2013

My Alabama Chanin Beaded Blue Bolero

My latest Alabama Chanin style masterpiece!


This is a beaded bolero from the Alabama Studio Sewing & Design book.
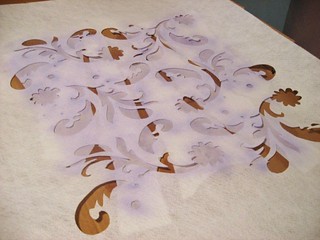
It's made from a single XL 100% cotton t shirt that I bought for $.99 at a Salvation Army. I placed the sleeve hem on the original sleeve hems. It's made from a single layer of fabric and stencilled in white fabric paint with the Paisely stencil that I downloaded here and stitched with silver lined bugle beads in two lengths and seed beads. I used the cretan stitch with smaller bugle beads to apply the binding. I also added a few swarovski lochrosen on the smaller dots in the paisely pattern.


I was inspired to make this project late last June as a run up to the fourth of July. I was seeing a lot of stars on blue clothing and liked that idea so I was originally thinking of using the star stencil, but in the end I thought that was a little too on-the-nose. I'm so happy with the way it turned out. It's very sparkly but the cotton makes it easy and comfortable. It's going to be a dress-up-or-down kind of garment. I can't wait till tank top weather to wear it! 


Some more info on the process:

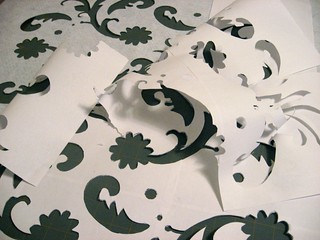
The oak tag and mylar stencils used on my last projects where a PIA to cut! It took too long and hurt my hands.  I can confirm that the purchase price of a stencil from Alabama Chanin is totally fair and if I didn't want them all I would consider buying one. Alas, I can't afford them all so for this stencil I decided to try another material. I spent some time researching "pennant felt" as it is described in the books. I searched all over the interweb and was only able to locate it on the AC website. I figured "pennant felt" must be a term that they use to describe a product that is available under another name but I haven't found it yet. I did purchase some craft felt from Dick Blick but it turned out to be very soft and thick; too fluffy to be a good stencil. I don't like not having options, but I do like supporting Alabama Chanin so I caved and bought 1 yard from them.


It's thin and firm and easy enough to cut, although still fairly time consuming. It's also fairly wide so I'll be able to get 2 stencils out of the one yard. The first one is the paisely stencil and I'm still deciding on the next one. I was going to cut either Anna's Garden or the Facets but now that the lovely Heart stencil has been added to the resource page I am even more conflicted! Let me know if you have a  favorite.

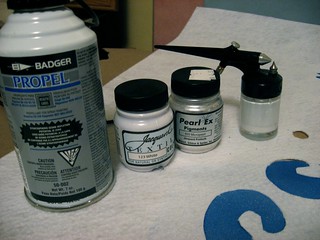
The cheap spray bottle that I used to stencil my first projects was starting to sputter and splotch and I knew that I wanted to make more stencilled garments so I went ahead and purchased a Badger Airbrush.


It's a little strange to use at first but I'm getting used to it.  I will need to get a larger bottle though because the bottles it comes with are quite small and I had to refill them twice for a corset sized project. Yes, I have an embroidered corset project in the works!


Unfortunately (or fortunately??) I need to focus on my wedding dress at the moment so it won't get any work until this summer so look for it later this year!

Wednesday, November 28, 2012

Drafting a Personal Fit Jacket – aka Pattermakers Block


I have been taking a patternmaking course at FIT this fall specializing in jackets and coats. Every week, we practice drafting the jacket block for a standard size 8 and learn how to create different jacket styles by changing the style lines. The class is from a production point of view, so there are lots of patternmaking details, tricks and methods to remember that will help make the construction more efficient and how and wear to adjust the fit when making pattern corrections. It’s been great. The weekly practice of drafting the block has finally sunk in and I sewing up the half muslin in less time each week. Practice makes better!

So now I’m starting to work on my final project and I have immediately run into a BIG problem. The final has to be of our own design, include the complete production pattern (w/ separate lining pieces, fusible, and templates) AND be accompanied by a full garment sample (we are allowed to employ a sample maker if we like). It’s also due in exactly two weeks. The amount of time and the scope of the project isn’t the problem. The problem is that we are allowed to use our own measurements for once, and of course if I’m going to go to all that effort I want to make the final sample wearable for myself.

Why is this a problem? Because I have a massive bust circumference (43”) and I carry a large portion of it on the front half of my torso. My front bust circ is 5” larger than my back. When we draft a block for jackets we place the side seam directly in the middle, which would make the back too big and the front too small, and give my a badly shaped back armhole to boot. This was never a problem as long as I was drafting for a size 8 (which apparently my back is). I am stumped on how to proceed and time is ticking away. Do I move the side seam closer to the back? Or do I draft the block based on my upper bust measurement and then adjust the bust as I would the hips when I add in my princess seam style lines? The later is closer to what I do with commercial patterns, but is a bit of a work around and defies the concept of drafting from scratch. I feel that there must be a right way of drafting this particular fit problem.

I was hoping my boss would be in the office today (he's also my professor - gotta love FIT) so I could pop into his office and ask him for 2 minutes of advice but unfortunately he is not here today, which means I am wasting another day that I could be working on the final.

Friday, September 14, 2012

Update: I've been busy


Just checking in for an update. No time for pics, just details:

Slow Sewing:
I managed to finish my Alabama Chanin green tunic/tank and a plain grey corset tank. I made everything in the XL size, and I think they may be a bit too loose for plain and moderately embroidered styles. Next time I think I need to take at least ½” off the back shoulders because the seam very forward on my shoulders (my back is kinda flat, my front is not so much) as well as raise the front neckline 1”. In the pipeline for the Alabama Chanin slow sewing is a blue sleeveless bolero and a pink retro panty and bustier set (burdastyle pattern). After a fruitless search of the interweb I ordered a yard of the pennant felt from Alabama Chanin which is slated to become a Paisley stencil and an Angie’s Fall stencil. I also bought a craft airbrush. 

Sew-Sew Summer:
I made a few dresses this summer to varying degrees of satisfaction. Hazel, which has a weirdly shaped facing (size 12 - am I the only one?) does not flatter me but the fabric is awesome and I wear it anyway. I also made a Tiered Maxi dress with that burdastyle pattern that is so popular. The fabric is a delicious Italian cotton floral, but without trim looks a bit like a nightgown. Also, the side zipper itches my tender flesh and is kinda unnecessary since I can pull the dress on over my head. I need to pick the zip out but the side seams will be different which bugs me. I want to make another version; short, no zip from a rayon challis floral with some wee trim at each tier. I cut a BS Fatima dress, but the fabric is noisy so I’ve lost interest half way through sewing it. I also cut a long striped jersey maxi dress but I need to take it in at the side seams (damn Big4 sizing again!) and it’s tricky to get the stripes to match up the 2nd and third time I stitch the side seams.

Chanel Jacket Update!
I attended a 90 minute “class” at Mood NYC this week with Susan Khalje where she went over the methods employed in making a classic french cardigan jacket. The class was very informative but I didn’t learn a whole lot of new information. I did find it helpful to go over everything in detail with a master couturier and I immediately got my Chanel jacket mojo back after seeing several ladies try on Susan’s famous samples. I brought both of my patterns to the class and Susan mentioned that she prefers the v7975 pattern to the newer v8804 pattern due to the built in shaping in the pattern. She said it is possible to convert a 2 piece sleeve into a 3 piece by splitting the upper sleeve vertically from the shoulder notch. She also discussed the dimensions and shape of the canted sleeve vent. Also worth noting; Susan uses silk organza to interline the top portion of the side front and back panels in order to stabilize the armholes. Overall I felt encouraged that the techniques employed, although labor intensive, are not terribly hard or complicated. No need to over think it. I confess, the pattern instructions in v8804 intimidated me with its specificity and additional construction techniques.

ETA: I found an AMAZING flicker set for the new Vogue pattern 8804. It makes me want to give that pattern a muslin. I think the sleeve is intriguing. Much of the online discussion about this pattern has been in regard to the "strange" grainline of the front top sleeve pattern piece however Claire Schaeffer herself weighs in on the subject in this flicker set!

Moving onward; last night I decided to remake my muslin in a larger size (16) using more traditional couture methods which I learned from Susan’s Craftsy couture dress class. One tip I will share is how I was able to easily transfer the pattern to the muslin. I have a Clover tracing wheel that has two adjustable wheels. The wheels are blunt so they don’t pierce or otherwise damage the tissue pattern. I set up the wheels 5/8” apart so that as I traced along the cutting line with the outer wheel the inner wheel traced the all important stitching line. This made it possible to skip drawing the cutting lines onto each pattern piece. I’m going to fit the sleeve as a two piece but I will draw the vertical seam line on it so I can check the placement.

Confession: I also bought a black tweedy boucle, complimentary silk charmeuse and thread for a 2nd Chanel jacket for fall. I will need to find appropriate trims later.

Knitting:
I participated in the Ravelympics, no wait, EXCUSE me, the Ravellenic Games. I did not medal (drat!) but I did finish my sweater. I love it, but I have no acceptable photos for the blog. Ravelers can check it out on ravelry.

I impulsively started a traditional aran fisherman sweater (stash busting, I swear) and I am already on the 2nd sleeve. It’s interesting and easy enough; great for tv knitting and commuting.

I need to cast on for me wedding shawl (to say nothing of my DRESS) but I am distracted by my current intarsia obsession. It’s all Kafe Fassett's fault. I found a 2nd hand copy of Glorious Knits and I am dying to make a carpet patterned (kilim inspired) cardigan jacket for fall. I’m going to Lion Brand Yarn Studio this evening for an event. I might end up purchasing a sweater worth of Amazing. If I do, it’s allowed because I finished my Ravellenic sweater with stash yarn and my current sweater is also stash yarn.

Studies:
I got an A in Patternmaking II. Hurrah! I am now enrolled in Patternmaking Jackets and Suits for the Fall semester at FIT. Learning to fit a jacket is supper helpful for work and especially for the Chanel jacket project. I am much more confident about fitting the new muslin. Two of the important things that I've learned so far are: 1) the Shoulder Slope is critical to the overall fit of the jacket, and 2) the Collar Sweep (outer edge of the collar) is critical to the shape and break of the lapel. If the collar sweep is too long, the lapel will break too high, if the sweep is too short, the lapel will break too low.

Saturday, May 26, 2012

Slow Sewing: Alabama Chanin

I have been bitten by the Alabama bug.

Like many other similarly obsessed artisans, I have taken up my needle and thread and I am slowly sewing some tops out of recycled t-shirts. This new hand stitched clothing project began after I treated myself to the Alabama Studio Sewing & Design book. I have been wanting to purchase one (ALL) of the Alabama Stitch books for a while, but I could never decide on which one to get because I like all the patterns equally. The only reason I got the 3rd book instead of the first (I am DYING to make the corset) is because the third book looked to be the most comprehensive in terms of techniques. Well, about a week after I received the first book I ordered the Studio Style book because I decided I need to have those patterns also. 

So, with my start-itis in full swing I decided to make some comfy tank tops. 

One top is from the Sewing & Design book;
CF & CB seam tank top

and the other is from the Studio Style book:
Princess seam tank top

First, I went to Mood and splurged on some organic cotton yardage ($12/yard, 2 yards), then I got nervous about what to make with my precious organic cotton so I went to my local Salvation Army and bought about 15 t-shirts to recycle. ($.99 each!).
 I found that XL and XXL with no side seams and only small printed logos work the best to get the most salvageable material out of.
3XL!!!! SOOOOooooo much green cotton!

Cutting the Pattern

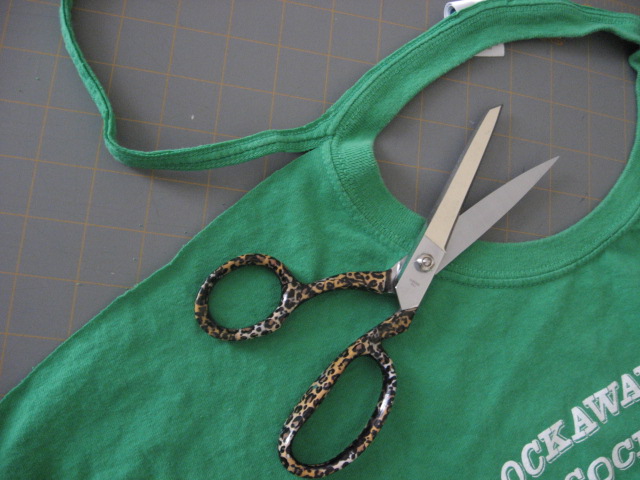
I cut off the sleeves at the seams, then snipped off the shoulder seams and the neck band.

I traced off the patterns** onto oak tag because I know I will use them again and they are easy to trace around with tailors chalk. I have lots of heavy jars and containers in my sewing room that I use as weights. 
I was able to get the entire tunic out of this t-shirt...

...plus a bunch of pulls.

Stenciling the Design

I bought a little spray bottle at a local art supply store for a couple of bucks. It is especially meant for watercolor use, but to tell you the truth it is pretty generic. I will remember to save my next travel sized spray bottle.  I also bought some Jacquard textile paint (it requires heat setting) but when I got home and went through my paint drawer I found that I already had a bunch of Createx paints that don't require heat setting.   
The spray bottle works well, but I when the paint level get's low it starts to sputter. I also had a hard time (I didn't test enough) getting the right water/paint ratio. The info is in the books, but I just didn't do a very good job following those instructions. It worked fine with more water than necessary, but my first stencil suffered from all the water and eventually started to disintigrate. 

I started out with an oak tag Rose stencil, but cutting it took FOREVER and it hurt my hand. When it started to fall apart I quickly decided that the (pricey) sheet of mylar (also purchased at the local art supply store) was probably worth taking the time to cut if only to have a sturdier stencil. 

I traced the stencil using a sharpie.
Cutting it out sucked almost as much as cutting the oak tag, but this one will last longer. 

I used Scotch reposition-able spray mount to adhere the stencils to the fabric. It worked out pretty good. 

center front & back panels of the princess seam tank drying on a rack

I started working on the princess seam tank first. This one is is going to be a negative applique with bright pink center and purple sides. (2 grey, 1 purple, 1 pink, large t-shirts). I'm using navy button craft thread. 
 
I wasn't able to avoid the logo on the back side panels because I didn't have a large enough grey t-shirt. I don't mind. It reminds me that these are reclaimed materials.

I've made good progress in the last week. I'm trying to decide if I'm going to cut out the leaves as well. I'm thinking yes, and I'll probably add beads as well. 

I knew I had these beads for a reason.

The green top will be a single layer with embroidery and probably beading as well.
center seam tunic 

That's about it as of today. I hope to post more progress and finished pics, but don't hold your breath.


** The Sewing and Design patterns don't indicate wish seam is the center fron and back!!! As a fashion person I find this MADDENING!!! The only way I can even guess is to look at the shoulder seams. In theory the slant should tell me which side is center. 

Friday, April 27, 2012

Bustier tops

The idea is to make a bunch of bustiers in a bunch of different fabrics so that I will be comfortable enough with their construction by the time I'm ready to make my wedding dress,

This is McCalls 6325... she's multi cup sized!
Real Rebecca Taylor via style.com
Vogue 1227 is a Rebecca Taylor pattern. Not Multi cup sized,  but she has that Vogue.


Free People Dress. I would love a denim or chambray bustier. 

Via BurdaStyle
 02/2011 #113 

Via Burdastyle
Bustier Dress 5/2011 #122B

Monday, March 12, 2012

OMG Anna Sui

So cute, I could almost barf. I adore Anna Sui, and I loath that I cannot pull off so many of her darling ensembles. Have at it crochetter moms, aunties and grandmas of fashion loving tweens. 


photos via style.com
Related Posts Plugin for WordPress, Blogger...