Pages

Showing posts with label Sew Along. Show all posts

Monday, December 30, 2013

Little French Jacket : Update #7

Just a quick update on my Little French Jacket project...
I started trimming my seam allowances and readying the lining for a lapped fell stitched seam.


I started on one front seam and worked my way toward the back but I decided to make a change on my second seam (the side seam)... to press the lining seams open and slip stitch closed rather than lapped and fell-stitched. Claire Shaeffer goes over both methods in her book, but doesn't really elaborate on why one might be preferable over another. I decided to make the switch because my boucle and my lining are rather light and the triple layer of lining on the lapped seam was quite visible and I didn't like it. It looked a bit unbalanced. After doing two seams open I unpicked the first seam and redid it. The show through is much less and more balanced in appearance. 


The open seams are accomplished by first pinning the seams together and pressing (above, top) and then basting with a quick running stitch on each side. After basting I can then slip stitch without concern for shifting the layers of fabric (above, bottom). 

I've finished the first half of the jacket and I have the next seam trimmed and pinned. I hope to finish up with all the vertical seams over the New Year so I can move on to preparing the sleeves. 

If I have one resolution for 2014 it is to finish this jacket by my 1 year anniversary (and to finish my thank you notes and photo album). 

PS... I REALLY HATE the new Flicker photo sharing code. 

Friday, December 6, 2013

"Chanel-Inspired" French Cardigan Jacket: Part 6


I may have mentioned this earlier, but I started to quilt my french jacket pieces over a year ago when I first started the project. I tested out the quilting on some pieces of scrap fabric slightly smaller than a sheet of paper and didn’t use an obsessive amount of pins, just enough scattered around so that the silk and boucle wouldn’t shift or slide much. The walking foot do the work, and went slowly starting from the same end for each row. The results looked good so I went ahead and quilted all but the center front panels.

Then I put the jacket aside for the winter, spring, summer, fall (took a jacket making class) and last winter when I made my wedding dress.  That brings me (more or less) to the present and despite being in 2 classes this semester I have finally come back to the project and made several new muslins to check and refine the fit. I decided to go up one jacket size and worked on same fit issues that I had previously.

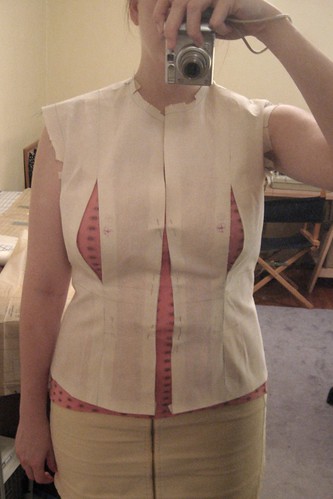
Muslin #1  - front not hanging straight

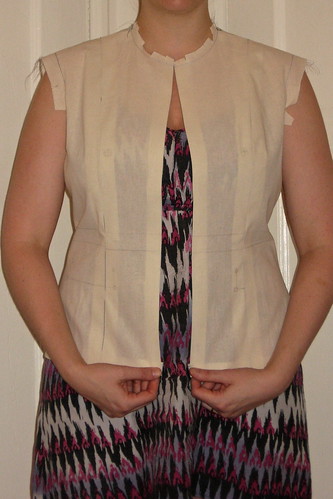
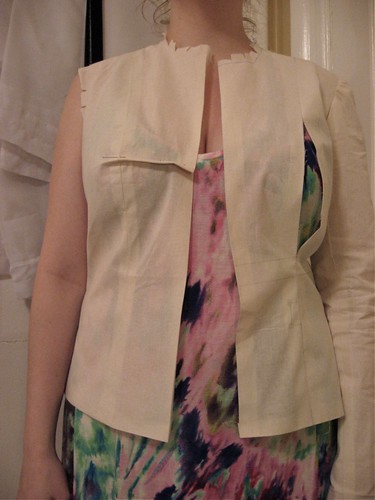
Muslin #2 - Neckline also overlaps at front
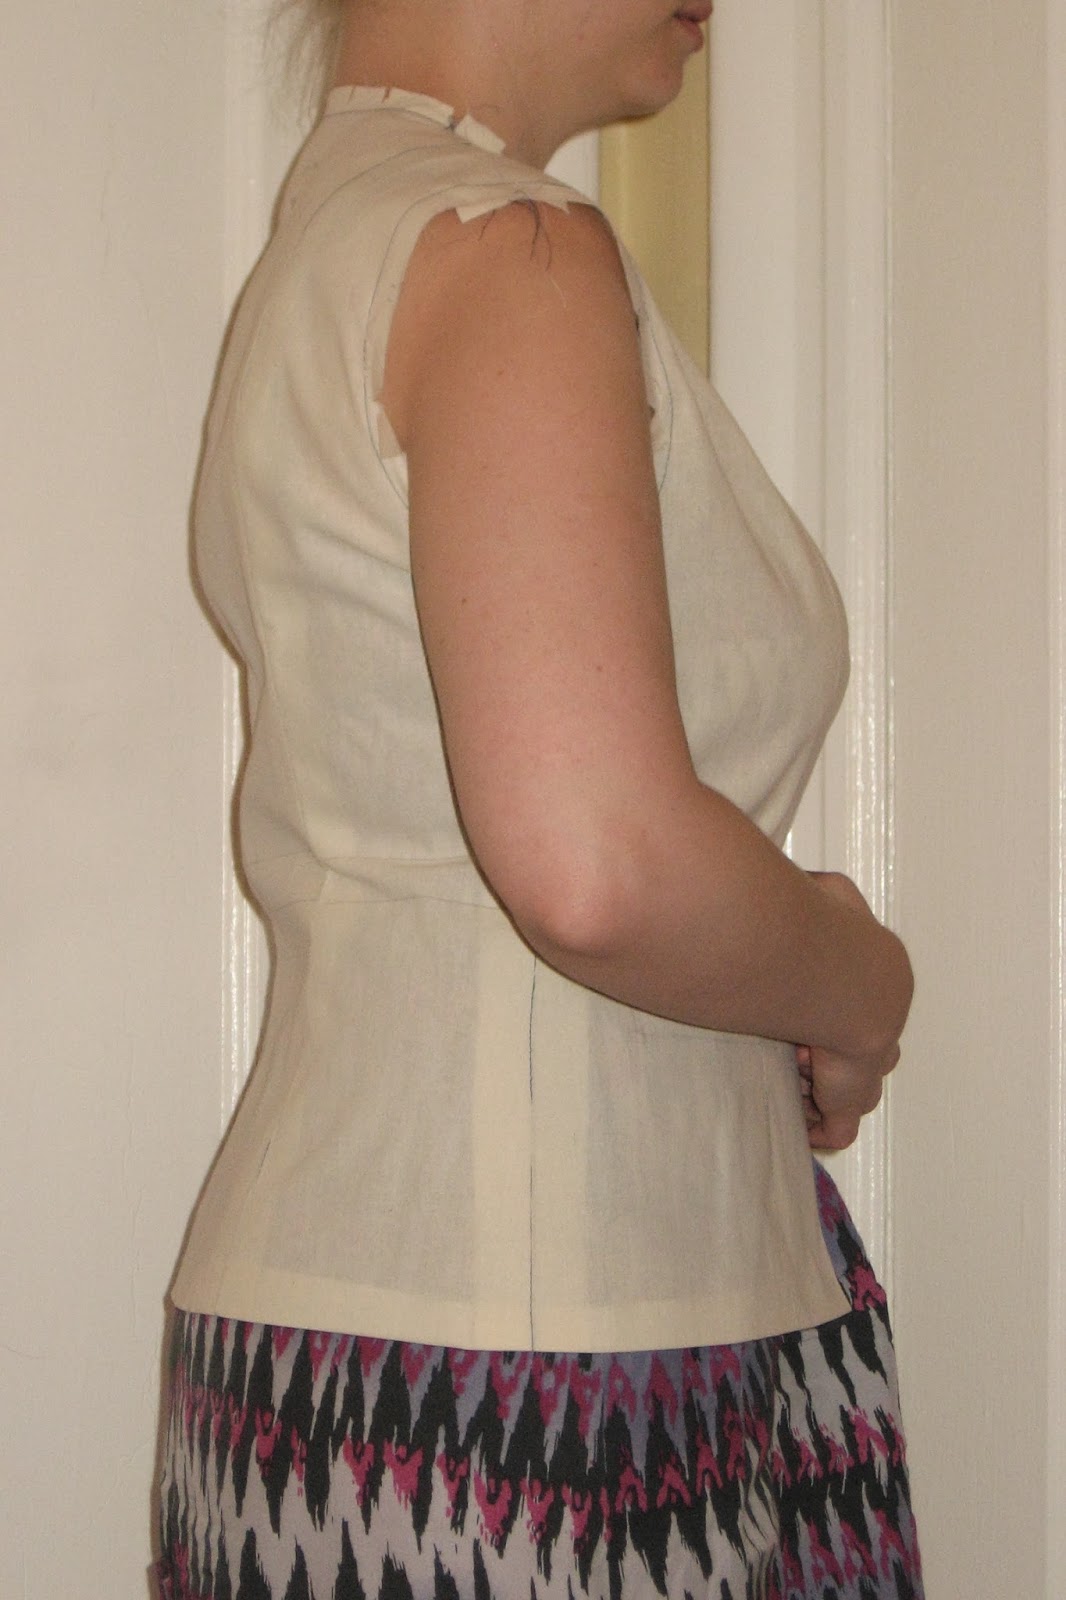
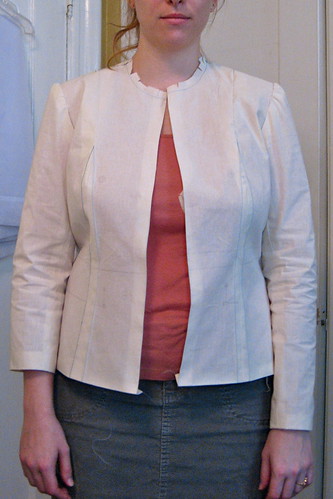
I don't have any pictures of the current V7975 muslins (#3, #4) but the problem is pretty much the same, the front is swinging away at the hem and the neckline overlaps at the top. The difference is that I now have a little bit more knowledge about jacket fitting. The first place one should address when dealing with this sort of fit problem is the shoulder seam. In order to get the front to hang straight (grain-lines are important in a muslin fitting!) one must correct the placement of the shoulder seam. In the case of this pattern, my shoulder seams are too far forward at the neck which is causing the problems.

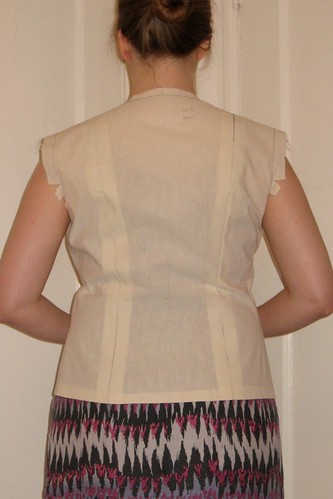
To correct the problem on the new muslins (I did this for all three that I made) I only used pins at the seams (yes, I have tons of scratches on my arms... don't say I didn't warn you) and I was able to re pin the shoulder seams in increments until I was satisfied with the placement of the shoulder seam and the grain-line on the front of the jacket. It turned out that the front pieces were fine, but the back pieces were too long/high and the back neck of the muslin was creeping up my neck.

evidence of my erect back (muslin #1)
Now, I have a rather pronounced front (ahem) and a rather straight, erect back. I often have wrinkles across my back at the bra line because my front is longer than my back thanks to my assets. I have done some research and know that an "erect" back alteration is quite similar to a sway back alteration.
(My fix usually involves picking up the back about/at least a 1/2".  By "pick-up" I mean to actually lower the back neck and shoulders. (note: Pattern, Scissors, Cloth has a great tutorial) In the case of this jacket I could easily see that the same alteration would correct the back neck and shoulder seam line.

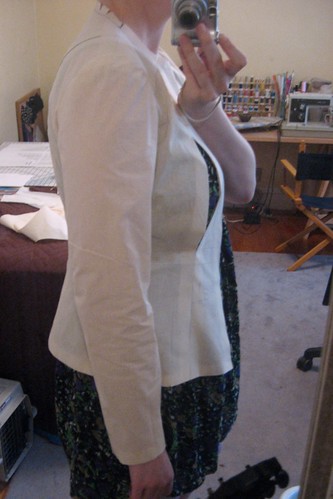
Muslin #3 - back correction
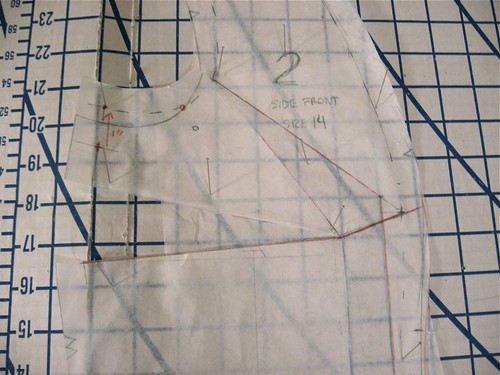
Further muslin refinements included a front FBA by letting out the front princess seams and replacing the bust curve. I also tried an even larger muslin (20) but the fit in the armholes and across back was too big so I went back to the size 18. The muslin adjustments were transferred back to my paper pattern and then I re-thread traced my pattern onto the already quilted pattern pieces. Thank Susan for those extra large seam margins! The difference was no more than 1/2" total so it should work out fine. For the moment I am leaving the original basting threads in.

The current state of the jacekt
I have also begun to machine baste the pieces together and I'm looking forward to matching and cutting out the sleeve pieces.

Thursday, December 5, 2013

Review: The Couture Cardigan Jacket by Claire B Shaeffer

I couldn't wait for black friday or christmas to buy Claire Shaeffer's latest book, Couture Sewing; The Couture Cardigan Jacket; Sewing secrets from a Chanel Collector, so I ordered it from Amazon while purchasing my hub's birthday present.

Recent Acquisitions
So... I've read almost everything there is to read on the subject (patterns, magazine articles, websites, blogs) so I knew that a lot of the information would be a little redundant. What I was hoping for was some further illumination on the process and of course the DVD that came with the book. 

I read the book in about 2 hours, maybe less. The print is large and there are a lot of pictures. That said, I don't feel that it is particularly light on content, however it feels more like an expanded construction for her Vogue 8804 pattern than a definitive book on the subject. The fabric choices and trim options shown in the book are rather uninspiring and there is no discussion of fitting the jacket or how a Chanel jacket should fit. She only mentions other patterns is in the DVD. Speaking of the DVD... all the step-by step pictures in the book are still images from the DVD, so the quality of the images is a little less than ideal, however the content of the images and the DVD is quite nice. I feel that the real value in this book is the DVD because there is just nothing like watching someone with years of sewing experience do the work. As Claire sews she is able to point out methods and details that an instructor might not think to mention after the fact. Overall, I'm glad I have this book/DVD, but it in no way replaces all of the other research one can and should do in preparation for their own Little French Jacket project.

Also, on black friday I was in the burbs visiting my in-laws and I managed to sweet talk my husband into taking me to Jo-Ann's and AC Moore. I was able to purchase a sleeve board with my black friday 50% off coupon and some clover fork pins, which I have decided are only marginally more useful than regular glass headed pins as they require a bit of attention to insert properly and WILL break your needle if you sew over them.

Wednesday, December 4, 2013

"Chanel" is not an adjective

I found this great video on Youtube. It is a talk by Cameron Silver given at USC Annenburg on the Chanel Jacket and the many commercial cardigan jackets it has inspired. It doesn't have many views yet but given the recent blog chatter about our Little French Jackets, I thought it might be something my fellow sew-alongers would enjoy.


My favorite snippets from the talk include these details:

  • Chanel created and made famous a formula that works; square cut, four pockets, silk lined.
  • The recognizable color palette; black, red, beige, white, navy blue, beige, and fabrics; jersey and tweed for the jackets.
  • Chanel supposedly said, "buttons have to have button holes, pockets be in the right place, useable. A sleeve isn't right if the arm doesn't lift easily." 
  • The chain in the hem; a little "luxe cache",  "a little hidden luxury".

At the end there are 5 models with cardigan jackets, some Chanel, some inspired.

That bit about the sleeve needing to lift or it's not right has really been on my mind a lot throughout this project. I think part of the problem is that jacket armholes are often too low, which makes lifting them difficult. It's something Chanel was known to fuss over so I feel encouraged to do the same.

Monday, October 28, 2013

"Chanel-inspired" French Jacket Revisited (Part 5) - Sleeve Pattern Woes

Soooooo.... Busy busy busy here, but obsessing again about my "Chanel" French Jacket project that has recently come out of hibernation. I figure if I can make a wedding dress there is no reason I can't finish this jacket.

Just to recap, I am using Vogue pattern V7975. I have recently decided to make a new muslin because it's been a while since I started the project and I still have some lingering doubts about the fit and size. So far I have only cut out and quilted the individual body pieces.  Having cut a large 2" margin around my pieces I have plenty of wiggle room to adjust for fit and size. 

One reason why I pressed pause on this project was because I wasn’t sure what I wanted to do about the sleeves as the pattern is a two piece and the classic french jacket is known for that 3 piece. I am not satisfied with the prospect of simply splitting the tops sleeve as this will not create the nicely balanced 3 piece pattern that I have seen on other blogs taken from another OOP pattern. It also wouldn’t look like the sleeve diagram proffered by Claire Schaeffer in her Couture Sewing book. I tried substituting the sleeve from Claire Schaeffer’s recent vogue pattern but it is not a good match. I’m waiting with anticipation for Susan Khalje’s new pattern/book and I plan to acquire Claire Schaeffer’s new book soon as well. I would really like to get the question of 2 piece vs 3 piece settled soon!

Another reason my jacket project skidded to a halt (other than The Dress project and my sleeve indecision) was because last fall I took a jacket and coat pattern drafting course at FIT and I think my brain exploded a little. I realized that substituting sleeves was not a wise choice without a little know-how and I knew my jacket project need to hang out while I processed my new knowledge. In class, I learned that sleeves are best drafted to fit the jacket body. The shape of the base of the armhole must match the shape of the base of the armscye and the proportion of the armscye is essential to creating a beautiful sleeve cap. If it doesn’t, there will most certainly be drag lines. Additionally, the amount of ease in the sleeve seams needs to be precise so that the sleeve will tilt forward and turn inward without any drag lines or collapsing. Drafting a good sleeve is a special skill, to say the very least.

This brings me back the V7975. The sleeve that comes with this pattern has a few identifiable problems. It is quite possible that most people haven’t run into any issues because they are ignoring the cutting lines altogether and carefully fitting and hand sewing their sleeves with excess seam allowance, or perhaps replacing it with a coincidentally better drafted sleeve. However, it’s been bugging me that there is no documentation about this online, so I felt the need to point it out incase anyone else takes issue with the sleeve pattern or doesn’t go the full couture method.
Vogue 7975 - via voguepatterns.com
Problem #1: The front seam doesn’t have a step. Both seams should have that step because it is the step and not the tiny dots that allow the sewer to correctly line up the seams. This may not be a problem for the couture enthusiast who is ignoring the cutting lines in favor of hand basting the sleeve carefully, but it aggravates me on a technical level.... production patterns have steps on both seams!
V7975 front sleeve seam - no step!
Problem #2:  If the front seam did have a step, the top sleeve would definitely twist and have drag lines at the back seam because the top sleeve step in the back seam doesn’t match the under-sleeve. If you match the steps (edit: and the tiny dots) and sew from the top down your sleeve is going to look like crap. Promise. Try walking the back sleeve seam up starting from the top notches and you will see what I mean. I believe that the double notches and the under-sleeve step are correct, and the step (edit: and the tiny dots) on the top sleeve should be raised to match. This will correct the wonky balance.
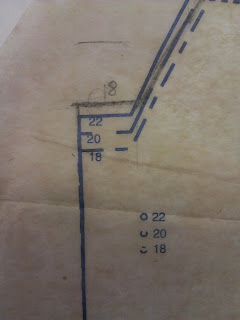
V7975 - Corrected size 18 back sleeve seam step
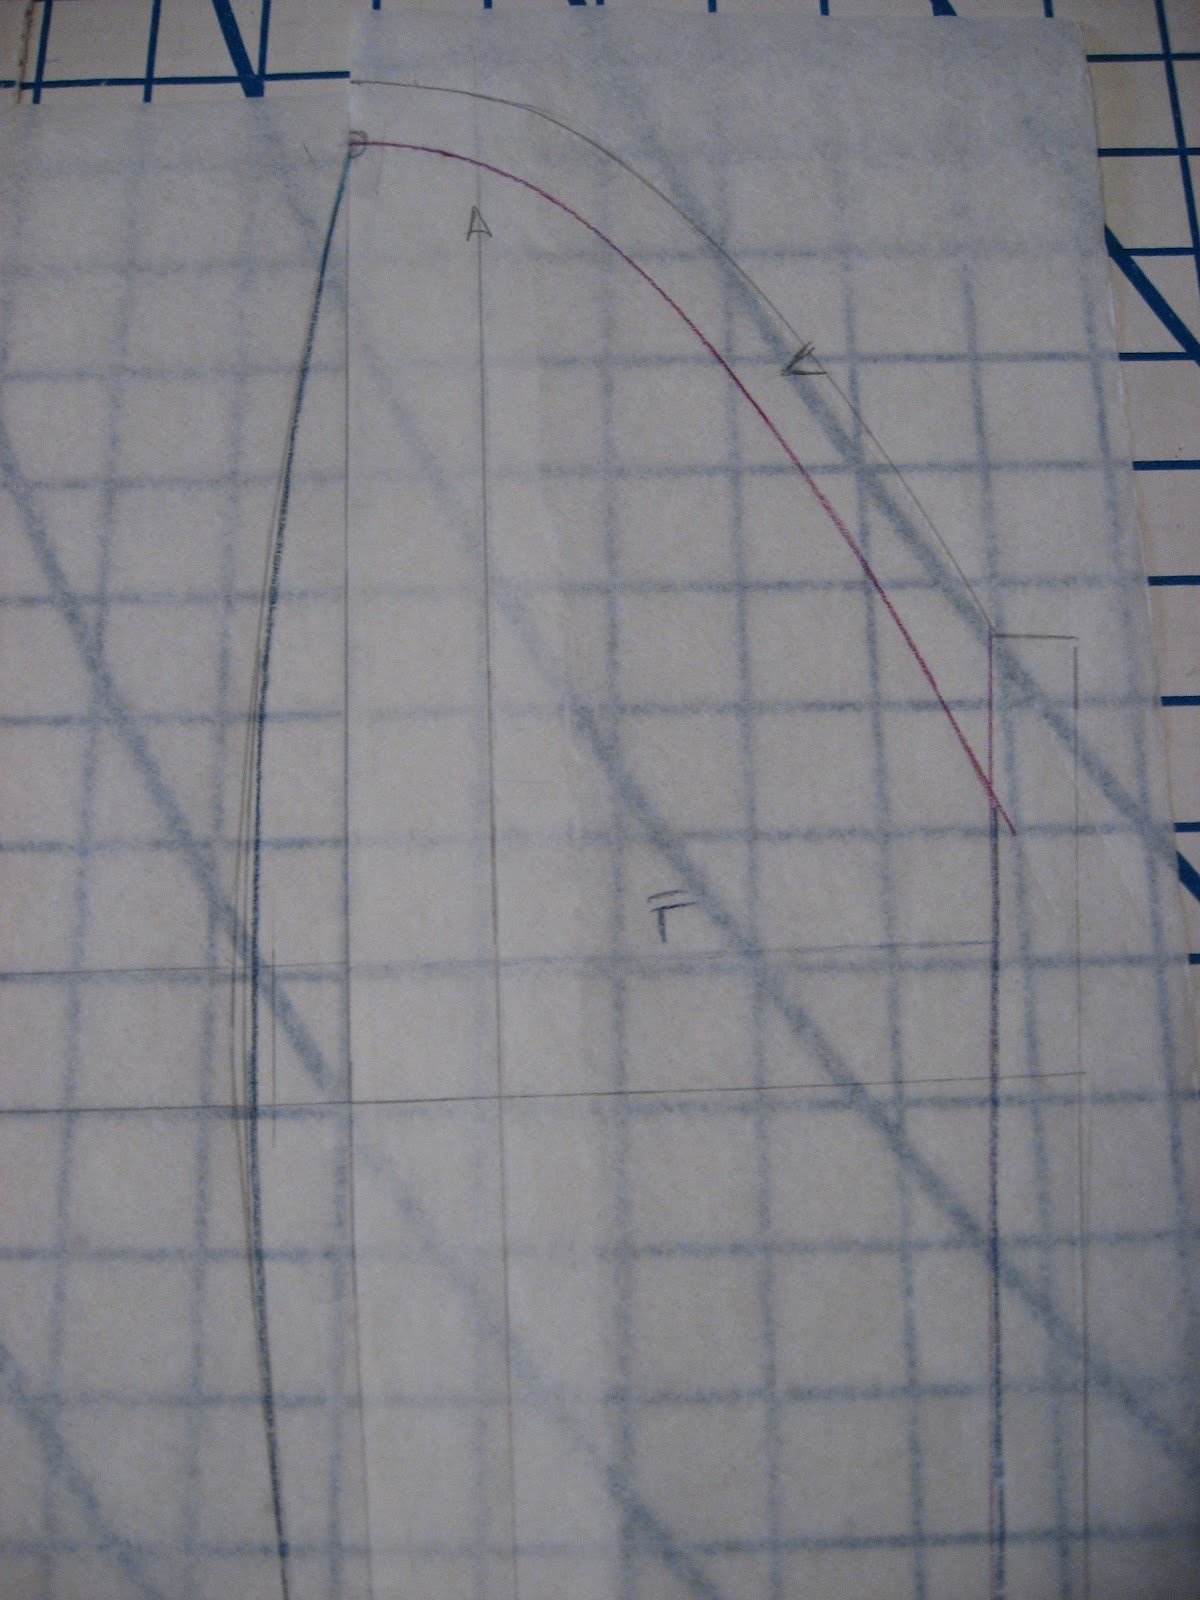
Problem #3: The underarm shape of the sleeve doesn’t match the armhole of the jacket. The back portion of the sleeve is higher than the armhole (if anything, the sleeve should peel away from the armhole, not jut up into it) and this will create drag lines on the under-sleeve.  I briefly talked about this concept on flickr in the Colette patterns forum when I noticed a funny spot in the Laurel sleeve/dress pattern.) It’s easy to fix though. I just layered my pieces on top of each other and retraced the armhole onto the under-sleeve.

V7975 - Pencil traced the armhole onto the under sleeve

So there you have my thoughts on the V7975 sleeve draft. Moving on…

I recently acquired McCalls 6401 (OOP, but check Ebay!) which has a D cup front. 
It’s a short jacket (20” long) but can easily be lengthened in the across front/back, waist and at the hem. I traced out the size 18 onto plain white paper and added 1” length in the waist & 3/4" length in the sleeve for muslin making purposes.
I also checked the sleeve for any step errors, and I am happy to say that the front and back steps are both correct.
M6401 - Perfectly matching notches and back step
I haven’t checked the shape of the underarm, but I will get to that and if there is anything to report, I will update this post. EDIT: The muslin for M6401 did not look as good as my latest V7975 muslin, so I'm sticking with Vogue.

So yeah, that's where I'm at right now with the French Jacket project.

Tuesday, September 25, 2012

Chanel Jacket: Part 4: New Muslin, Quilting Prep


I cut and fit the new muslin last week. This time I make a size 16. I ended up making the same FBA to the front by adding 3/8” to the front princess seam allowances from hem and then blending in to the seam just above the bust curve. It fits just fine. I don't have a pic at the moment though.

This weekend I fit the sleeve. It was tight across the bicep and didn’t have much movement. I checked the measurement and noticed that the bicep measurement on the pattern piece (15 1/8”) is not correct. The bicep actually measured 14 ¾”, so there’s that. My bicep is 13 ½” but 2” ease is the suggested minimum (according to my Jacket’s & Suits patternmaking professor). Also worth noting: the “step” on the elbow seam of the upper sleeve is too low. I corrected it by matching the dots and redrawing the step. BTW, the step is used in production patterns to line up the top of the elbow seam. Both sleeve pieces should have steps on the top of the elbow seam that match perfectly so that you can line up the first part of the seam easily. The dots aren’t even necessary with a correct step, but I digress. I had been contemplating just going with the 2 piece sleeve but since I’d have to adjust it to fit anyway I figured I might as well make it into a 3 piece sleeve; more on that later.


Since I have the new Clair Schaeffer pattern I decided to trace the 3 piece sleeve onto muslin and give it a try. It has more room in the bicep but there is a LOT of sleeve cap ease; too much for the body. I suppose it could be the fact that it doesn’t really belong to the pattern body, but I wouldn’t know unless I muslin that body which I am not going to do at this time. The interesting thing about this sleeve is that all three pieces are quite curved. When the constructed sleeve is laid on a table it doesn’t lie flat and the wrist pops up. Basically the sleeve is shaped to mimic the way our arms naturally curve forward and inward. The curve of the outer seam is so pronounces that I think it makes the arm looks very rounded, which I don’t like. I want slim looking arms please! I think the “odd” grain-line on the front sleeve is intentional to get the grain to appear straight on the front of at the shoulder and especially at the third seam, but the curve kind makes this a moot point. I think it was worth trying and I wouldn’t write it off if I were to make the Claire Schaeffer pattern later.


So back to original 2 piece sleeve which I transformed into a 3 piece and increased the bicep approximately 1 ½” total. To do this first marked the bicep line and then I split the upper sleeve in half vertically (parallel to the grain-line) from the shoulder seam notch and then gently curved the line toward the front below the elbow so that it bisected the wrist in the middle. I taped each half to some extra paper and then added 5/8”~3/4” at each bicep point and used my hip curve to blend into the shoulder point and wrist. Then I added the canted sleeve vent under-lap on the back piece. I haven’t yet, but before I cut the fashion fabric I will cut muslins of this new sleeve and to check the fit once again.


In the meantime, I’m preparing the body panels for quilting. This involves 1) thread tracing the pattern piece using a single strand of red dmc embroidery thread; 2) placing a silk organza armhole stay under the side front and back panels; cutting a square of silk jacquard lining and pinning it to the underside of each panel being careful to preserve the grain-line of all pieces. I got all 4 armhole panels completed last night so I think I should be able to do the center back and center fronts tonight. Then I will move onto the quilting phase!


I am super excited about the quilting part. It means I will finally get to justify my walking foot purchase (although I already used in on a mini quilt) and I’ll get to see how the hand of the fabric changes when the lining layer is added.


I also got out my trim again and started looking at it on top of some pieces of bias that I cut. It makes me very excited about this project!! I’m trying to be cool about it though. I don’t want any perceived setbacks to ruin the rhythm I’ve got going on.

Wednesday, August 10, 2011

Chanel Jacket: Part 3: Fitting with the professionals

I wasn’t feeling confident about the idea of cutting out my Chanel jacket last night so I brought my muslin to work for some professional fit advice. The fact that I haven’t done so before now is kind of amazing considering I work for a jacket manufacturer and my closest coworkers are tech designers and pattern makers, whom I have told all about this project. One of my lovely cubicle buddies helped me fine tune my muslin and has promised to help me re-evaluate after I make the adjustments to the muslin.

These next pattern adjustments will include:

  • Lowering the armhole ½” (1/2” higher than the original pattern) on one side, and back to the original a/h on the other side for comparison.
  • Letting out the side seams ¼” each for an added 1" circumference
  • Letting out the sleeve seams 1/8” at the bicept for an added ¼” ease
  • Reducing the shoulder seam length ¼”
  • Reducing the cross back ¼” on each back armhole
  • Pinching out and transferring excess armhole ease to the shoulder princess seam.


I’m feeling good about these adjustments. Wish me luck!

Saturday, July 30, 2011

Chanel Jacket: Part 2: Muslin Making

I am currently knee deep in my Chanel Jacket Muslin fitting.

Recap: Pattern: V7975, short version with no overlap.

Initial Pattern Issue: This pattern does not have the 3 piece sleeve that I want and none of the other patterns with a 3 piece sleeve are in print. I even enlarged the diagram from the Great Sewn Clothes book and printed it out to scale to see what I could glean about the fit and attempted to redraft a sleeve for my pattern taking these details into consideration.  I was obsessing a bit much about it so I asked my sewist friend Sara of and Sparrows and Honey Bees for her advice. She assured me that I 3/4 length 2 piece sleeve would be fine and appropriate for a summer jacket. I'm still thinking about it, but I'm probably going to take her word for it and keep working on the sleeve pattern puzzle for a wool boucle winter version.


 Muslin #1: Like a good little apprentice couturier, I made a muslin. I started with size 14 according to my high bust and I knew I would need to lengthen it so I added 1” to the bodice and sleeves prior to cutting the muslin. According to my research the classic Chanel jacket has very high armholes, so I also raised the armholes 1 inch (but traced out the original armholes for comparison) and only inserted one sleeve. I sewed it up with 1" seam allowances and tried it on. The armhole fit is good although the bicep may be a tiny bit snug (still contemplating that). I'm happy with the way the back fits. The one issue I have is with the front. Obviously, I need a FBA.


Muslin #2 I followed Fit For Real People’s approach to the princess seam FBA. FFRP offers 3 options for FBA on the princess seam: adjust the front piece, adjust the side front piece, or if the adjustment is very minor one can just add to the princess seams. For larger adjustments (ahem DD over here) FFRP has you choose based on the how far apart or close together ones bust apex is. The idea being that the princess seam should fall on the apex. My bosoms must be pretty well centered because they were already on the princess seam (minus the 1” FBA needed). Unlike Erica Bunker. who adjusted the front piece, I opted to modify the side front piece. I spread the bust 1” for my DDs. I was rather proud of my pattern modification and re-cut a side front and front muslin piece and attached them to the half of my muslin that did not have a sleeve.


Result: the front piece is WAY TOO LONG, causing the CF to hang down and out.  Because I spread my side front 1" I ended up adding 1 ½” length to the front piece which caused the front edge to hang down and swing away, and caused the CF to look curved rather than straight. Bummer.

Problem solving: I pinched out 1” at the CF and tried to determine how to adjust the front piece to reduce the front edge length only but I was stumped. FFRP does not address the princess droop for an open jacket. It only offers a solution for a dress which is to hack off any excess length at the bottom of the front panel, which is an inelegant solution (IMHO) that would not work for me here. I though real hard and as the hour of my bedtime drew nigh I began to fear going to sleep frustrated. In a moment of desperation I undid the princess seam on the other half of the muslin that had the original pattern and let out my seam allowances (1” muslin seam allowances are a MUST folks!) so that my remaining SA was ½” from the hem to the bust point and then tapered into the original seam. It worked. I had my 1” added width and My CF edge is straight. My hem is straight(ish) This FBA is way easier than the FFRP version.
I think I'm going to let out the side seams below the waist about 1/8" and pinch in a bit of the front princess seams above the bust before I finalize my pattern revisions. I'm also still trying to decide about the sleeve length.... 3/4 length or long sleeve. My BF likes the long, but as a summer jacket a 3/4 length would be just fine and I could always make this again as a winter jacket with a black wool boucle and long sleeves. I still want to try to figure out the 3 piece sleeve pattern (or find a copy of the Sandra Betzina pattern). 

Thoughts on my progress so far are welcome!

Saturday, July 23, 2011

Chanel Jacket: Part 1: Dreaming & Scheming

Let’s pretend that I haven’t neglected my blog for months, and jump straight into my current project obsession: the Chanel Jacket.


There are a great many sources of inspiration and information that have helped fan the flames of my desire:

- There is the Go Chanel or Go Home blog, to which I hoped to become a member so that I can add my own pattern alteration experience to this archive.

- Threads Magazine issue121 from 2005, the "Inside a Chanel Jacket" article by Susan Khalje has invaluable information (I had to call Tauton press to order a back issue since they appear OOP when the quantity drops below 20). **hint** One might be able to find pics online of the article if one is clever.

- Book: Great Sewn Clothes (from Threads) - covers the Chanel jacket construction details and includes a handy diagram of a Chanel jacket pattern.

- Book: Couture Sewing Techniques by Claire B Shaeffer, has much the same info as the Threads book, but goes into greater depths about many couture techniques.

- The amazing Signe Chanel documentary…. Especially the section on the braid maker.

- The runway show archives at style.com.

- Ebay… real Chanel jackets for resale often come with great detail pictures!

- Erica Bunker’s version of the Chanel jacket comes up quickly in a google image search. Erica’s blog is my go to whenever I start a new vogue pattern because she makes many of the same pattern alterations that I do and to the same pattern size.

- Marina is the couture blogger for Burdastyle and Frabjous Couture, took an in depth Chanel Jacket sewing course with Susan Khalje and shared many details from the class on her blog.

- You know that feeling you get at a store…"I could make that for way less!” I even had that thought in the CHANEL store in Soho. I tried not to look like I was dissecting the garments while I admired the lovely trim and buttons, but you know I was.


So, of course I have launched my own Chanel jacket project.
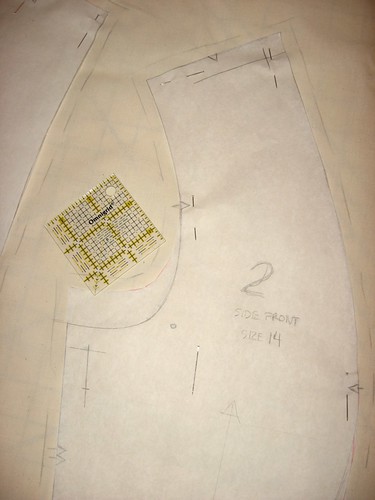
My Chanel Jacket:
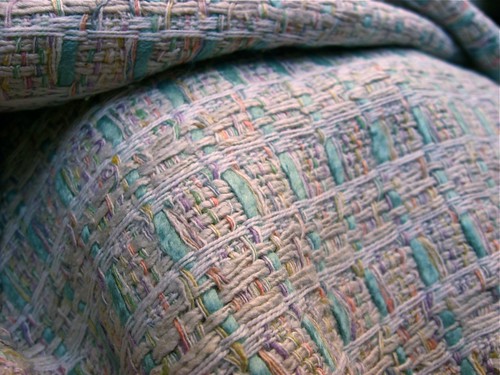
Fashion Fabric: Silk boucle from Chic Fabrics on 39th between 7th and 8th.


I think I got this fabric for $6/yard... I only spent $40 total on fabric, and the lining was pricier than the boucle. Lining Fabric: Silk jacquard lining (also from Chic Fabrics) for $10/yard. This will be a summer jacket.


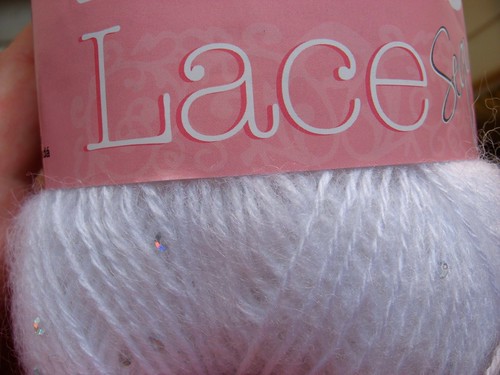
Trim: I intend to make a fancy braid with threads from the boucle I will also use a selvage or bias cut fringe as a base and I bought some nifty lace weight yarn from Patons that has a bit of sequins in it to include with the braid for a touch of glitz.


Pattern: V7975, short version with no overlap.

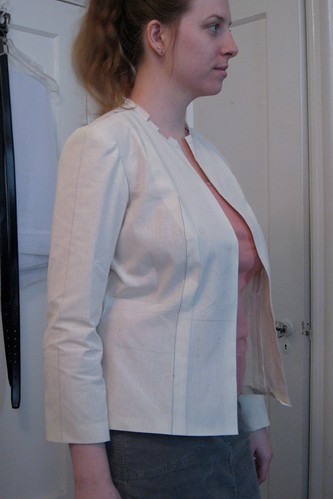
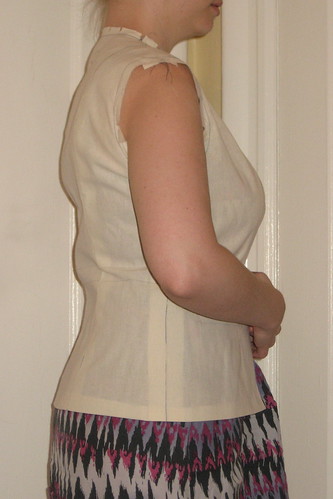
Pattern Issue: This pattern does not have a 3 piece sleeve. I WANT a 3 piece sleeve. None of the other patterns with a 3 piece sleeve are in print. I even enlarged the diagram from the Great Sewn Clothes book and printed it out to scale to see what I could glean about the fit and attempted to redraft a sleeve for my pattern taking these details into consideration.  My obsessing about the darn sleeve is a bit of a sticking point but I really want to get going on this project.  I may just keep working on the sleeve pattern puzzle for a wool boucle winter version and stick with a 3/4 length sleeve for this summery version.
Related Posts Plugin for WordPress, Blogger...