Pages

Showing posts with label FO. Show all posts

Sunday, September 25, 2016

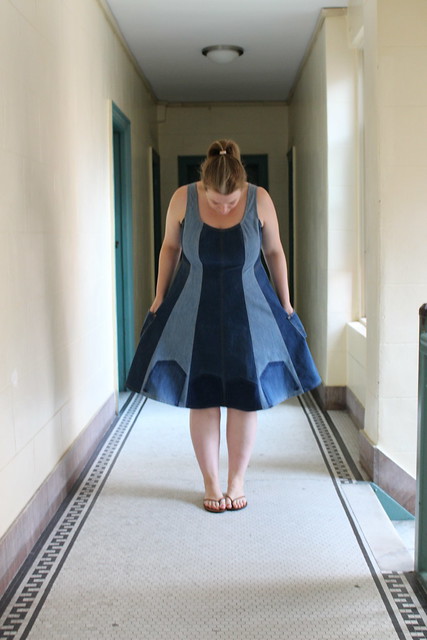
Refashioner 2016 - Denim

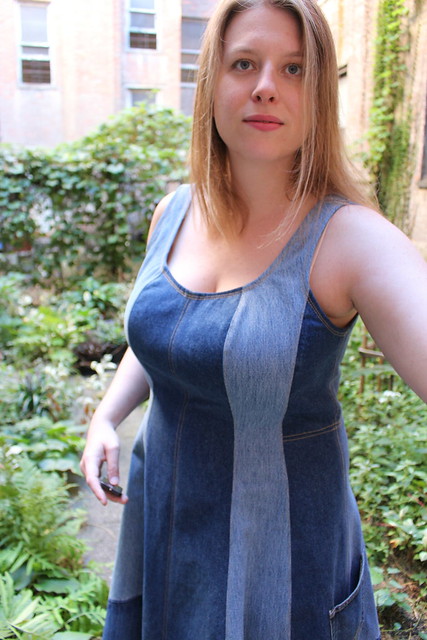
Y'all, taking pictures of oneself is hard. This is the first time I used my camera and remote to take remote pictures of myself and all I can say is thank goodness for that flip out screen! I have so much respect for all of the lovely bloggers who do this on any sort of regular basis. 


This project is my entry for the Refashioner 2016 Denim challenge
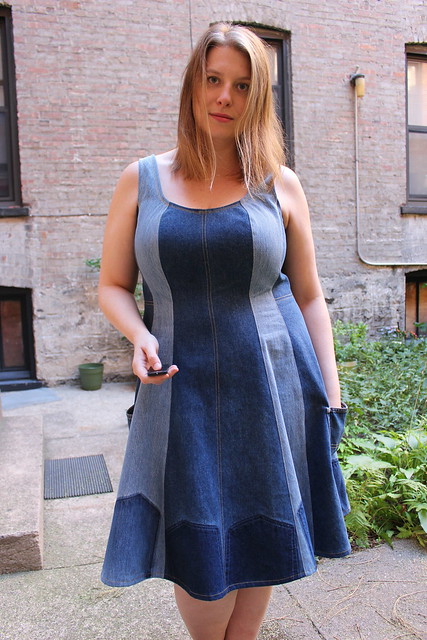
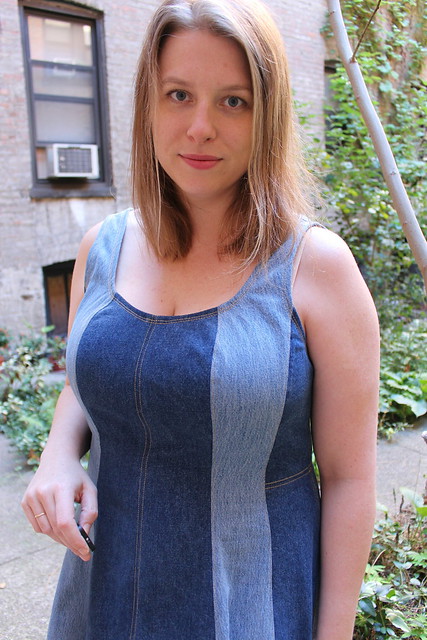
Originally I thought I would make a top a la Rachel Comey, but when I saw Carlolyn's scrappy denim dress I knew I wanted to attempt my own dress. 


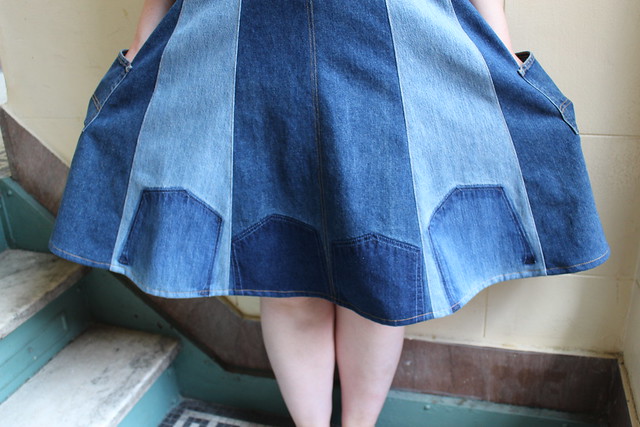
Materials: 3 pairs deconstructed men's denim jeans 100% heavy cotton denim. On pair of light Levis 50ls that I had on hand, a pair of Wranglers and Polo Ralph Lauren that I purchased on sale at a local Goodwill. Jeans sewing thread and top-stitch thread.


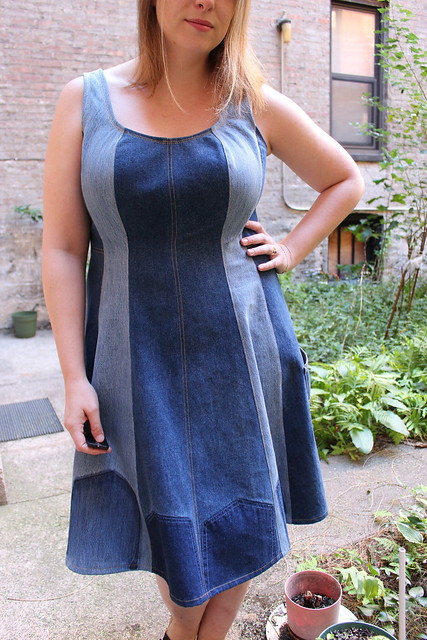
PatternB5745 OOP. I had this in my pattern stash for a while and it actually lists denim as one of the suggested fabrics. It is a fit & flare dress with multiple panels and multi cup pattern pieces.


Cutting Notes: The challenge was to turn denim jeans into another garment, I had to fit the pattern pieces carefully onto the denim. Also, the denim is quite heavy and was to hang from rather narrow straps so I wanted to reduce the flare of the skirt. Therefore, I removed 1" from each panel seam at the hem (2 inches per seam, which is something like 18" total!!!) and blended through the hip. The only place I did not reduce was the CF seam, which are straight. 


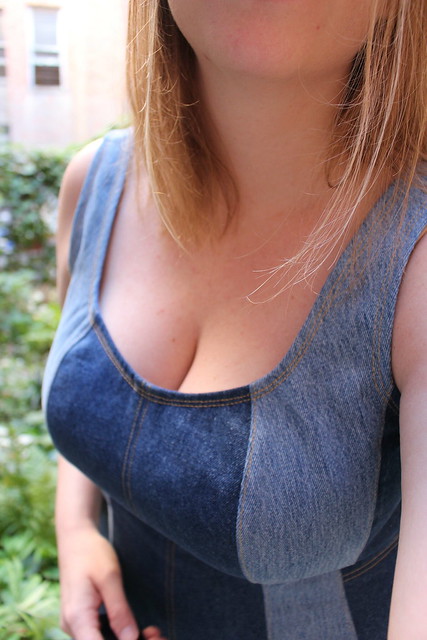
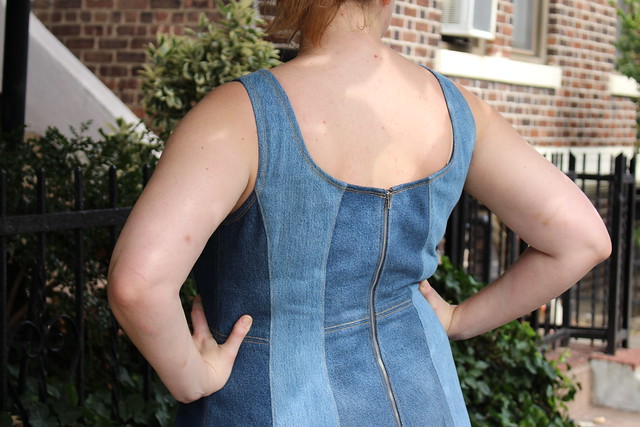
I liked that the front was low but the cup shaping prevents it from gaping scandalously and the low back makes it very comfortable in hot weather, which was somewhat surprising given the heaviness of the fabric.

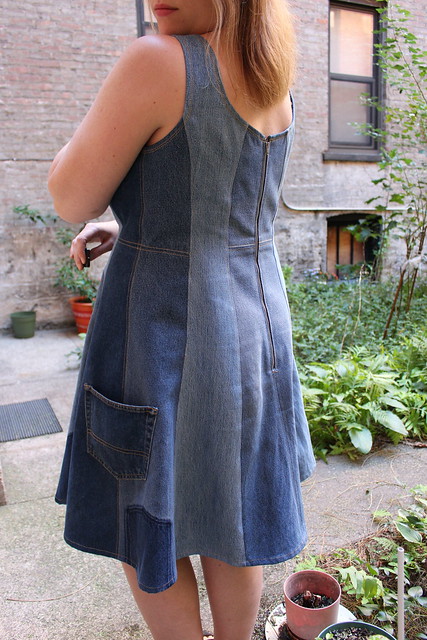
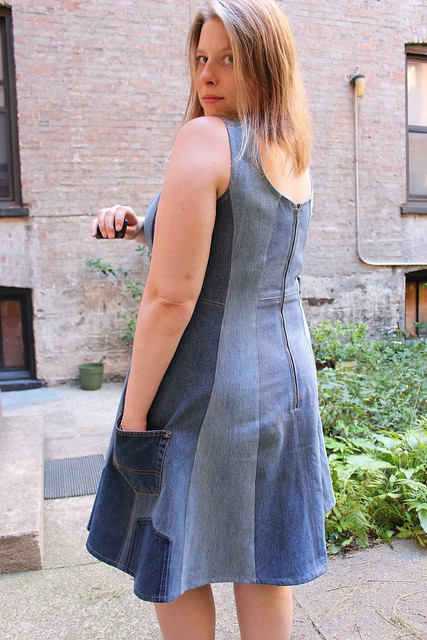
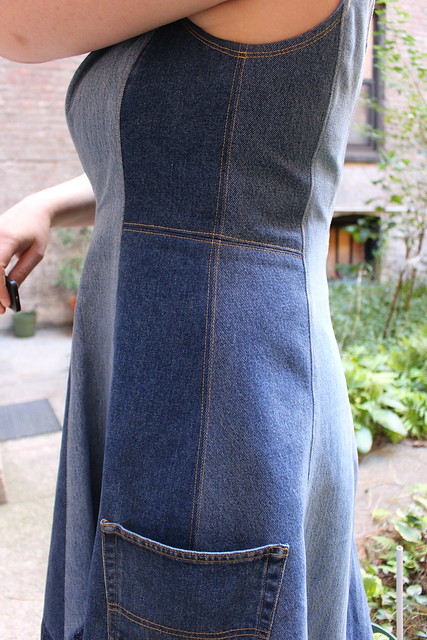
Construction Notes: The CF, CB and side seams are all over-locked before seaming, pressed open and then top-stitched 1/8" on each side of the seam. I used purchased navy single fold bias tape instead of self bias to face the neckline and armholes. My Bernina handled the heavy denim like a champ, but adding further bulk in those areas wouldn't have been a good idea. I installed a metal zipper instead of an invisible zipper and I applied it so that the teeth would be exposed.


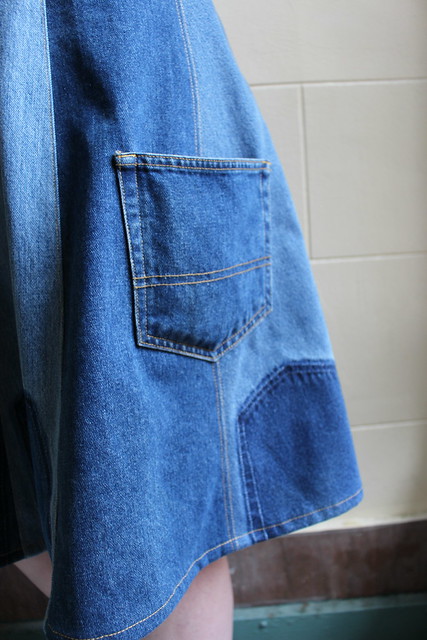
To further use the denim material I added two of the jeans pockets to the sides where my hands fall. They feel a little awkward that far to my side, but I like the way the placement looks centered on the side seam. I thought about adding more of the pockets, but I haven't settled on any placement that I liked.


I'm delighted with the way this dress turned out. It's very comfortable, cute, and appropriate to wear as a transitional garment for fall. I've enjoyed wearing it this weekend as the weather cools off and I really enjoyed participating in the Refashioner challenge this year.


Friday, August 14, 2015

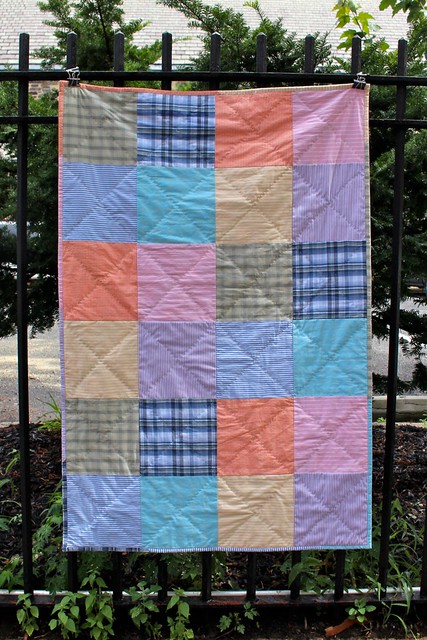
Bow-Tie Block - A Baby Quilt

Not just another baby quilt. This one is for a BOY,  and I'm not related to him. 
He belongs to a couple from church and when they told me they were expecting 
of course I jumped at another chance to make a baby-sized quilt.

This quilt is also special because I didn't use quilting cottons. 
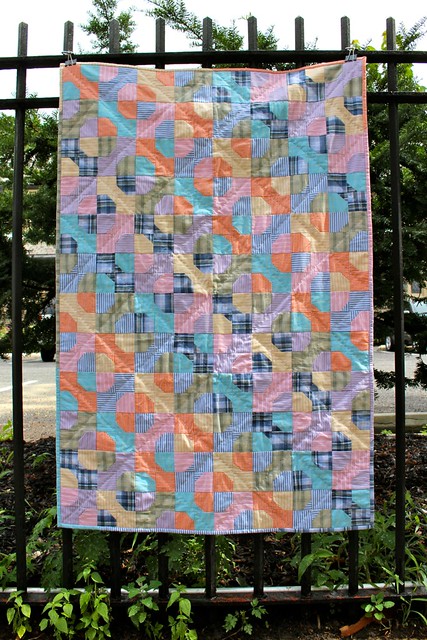
The fabrics for this quilt are entirely 100% cotton shirts that I thrifted and washed and sliced up. 
There are lots of progress pics on my instagram so I'm just posting the finished photos on the blog.

IMG_0012

I also designed this quilt myself. Winging it means I designed it right?
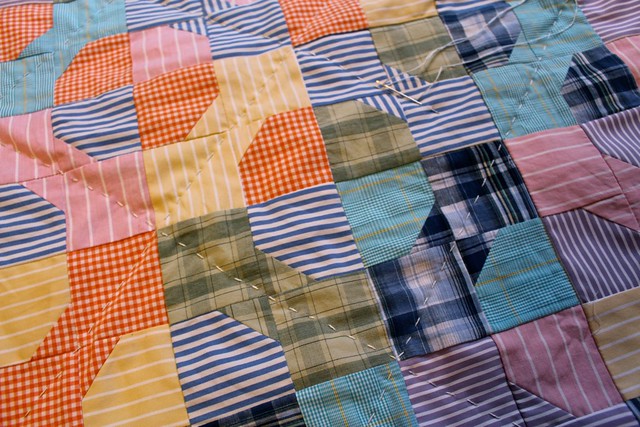
I got the idea after seeing this Quilty; This Is My Quilt episode on Youtube a long time ago and have been waiting for an opportunity to co-opt the idea of using recycled cotton shirts. Baby quilts are the perfect size to experiment with new ideas. Instead of copying the inspiration quilt's design, I used a basic bow-tie block and arranged them in an "X's and O's" design. I had enough fabric left over to piece a patchwork backing (and plenty more fabric for another scrappier quilt!)

IMG_0016

I hand quilted this one using the big stitch quilting technique and DMC perl cotton thread.

IMG_0004

I love it! 

Monday, August 10, 2015

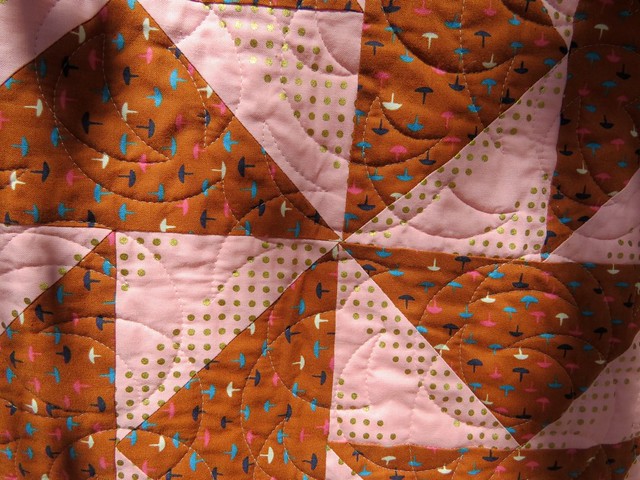
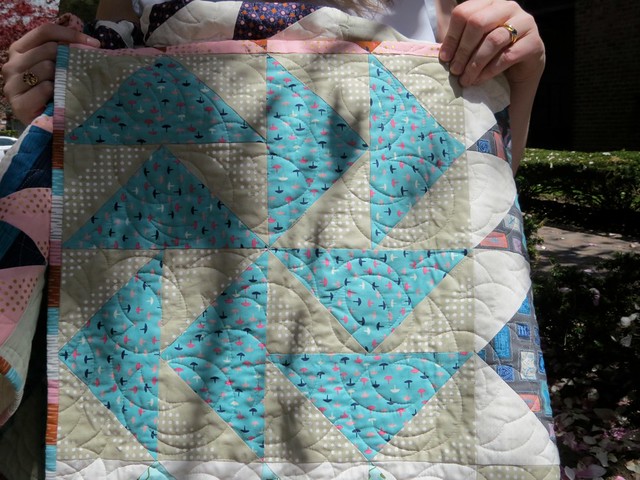
Flying Geese - Cotton and Steel - A Friendship Quilt

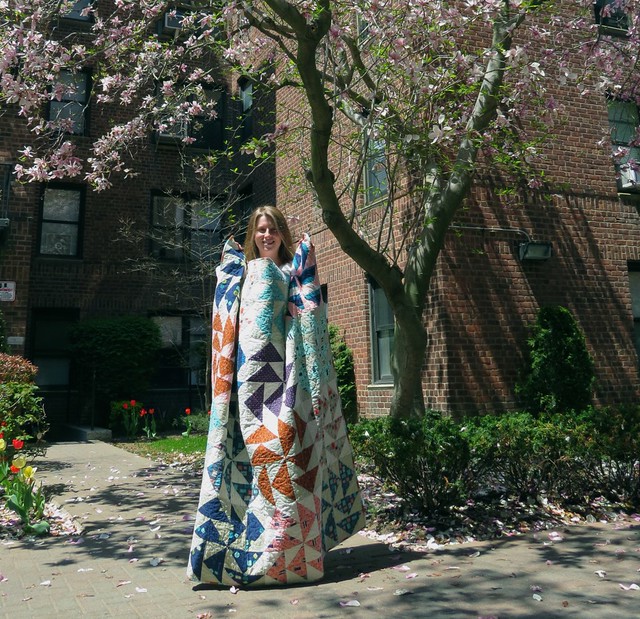
This quilt was made for a friend this past winter/spring. 
She was furnishing a new apartment and I know a good excuse when I see one.  

IMG_1613
Sofa sized.
The fabric is from a kit I bought on craftsy, although the pattern can be acquired for free on the Cotton and Steel website. 

The original layout
I changed the design a lot because with the limited palette I thought the design was a bit boring.
I'm starting to see that I like the limitations of a kit but like to change up the design.

IMG_1628

IMG_1629
I am very proud of my points. 
IMG_1630

IMG_1633


IMG_1616
The obligatory wrap myself in awesomeness 

Quilted as usual by the lovely Linda Lovett. 

Friday, August 7, 2015

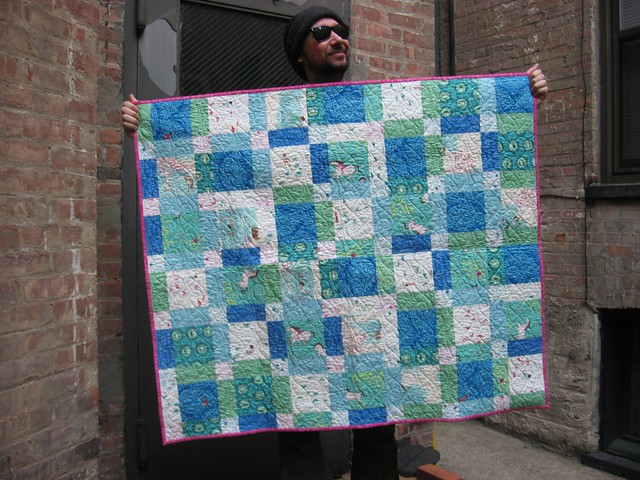
Wee Wander Disappearing Nine Patch - A Baby Quilt

Another one of my cousins had a baby! Last fall. Oops. Bad blogger.
In my defense, I sent this quilt to them right about exactly the time the lovely Lena made her entrance into the world. I just haven't had the blogging mojo to brag about it.
Anyhoo. This is the quilt.

IMG_0962
Hubs makes an adorable model. 


IMG_0958
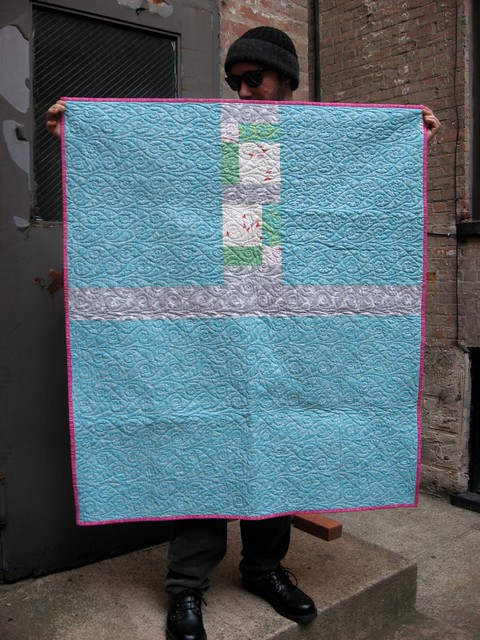
The Back


IMG_0960
I had to give up on the idea of there being a "right side up", although this is technically sideways.


IMG_0961
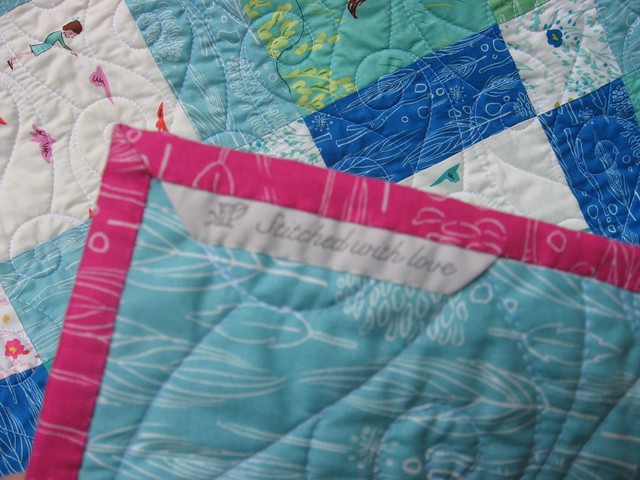
Focus! The label says "stitched with love" and was given to me by my friend who eventually got her own quilt

These are the details:

Pattern: Disappearing Nine Patch; some variation I made up after a bit of googling. I'm sure I got the idea from one of the Missouri Star Quilt Company YouTube videos.

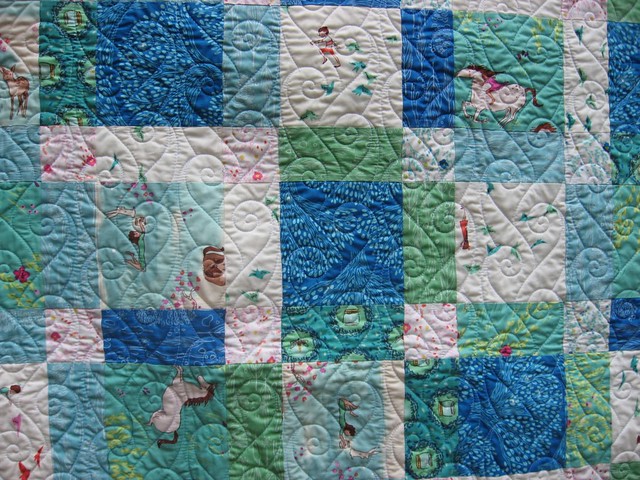
Fabric: Wee Wanderer Twilight Palette by Sarah Jane for Michael Miller. It was a fat quarter bundle and I got some extra yardage from City Quilter. I also used some scraps from Ali's quilt on the back. 

Quilting: I love this pantograph! It's called Spiral Braid and was quilted by the lovely and wonderful Linda Lovett who has more photos on her blog of the quilting process. Linda is fantastic to work with; I highly recommend her. 

Thursday, July 3, 2014

A Bright and Rosy Baby Quilt


I'm usually a selfish seamstress, but I think I might be a generous quilter.

This cheerful quilt was just mailed off to it's new home and should arrive the day before this post goes up.

IMG_0942


IMG_0940
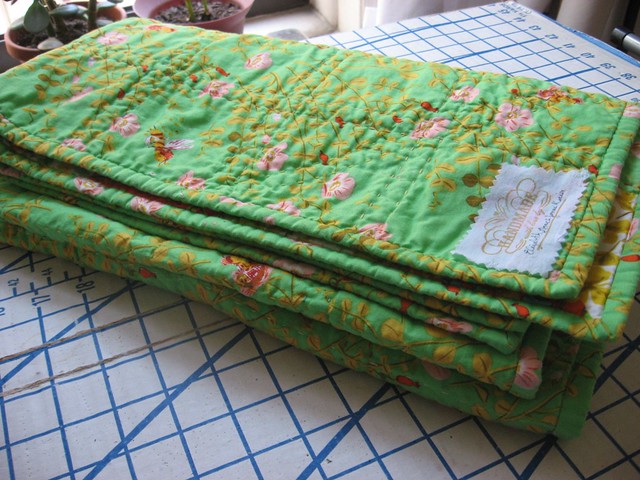
Not the final label
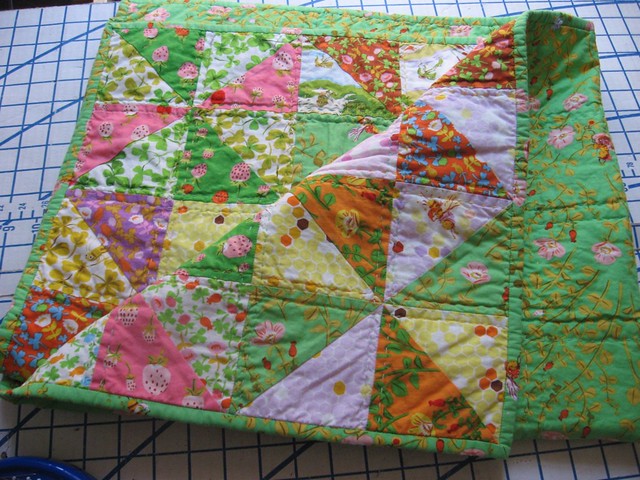
As soon as I heard that my cousin and his wife are expecting their first child (a girl!) I knew I had to make them a baby quilt. I had 2 charm packs of Heather Ross' Briar Rose in my stash just waiting for a baby to pop up on the horizon. I couldn't be more thrilled at this chance to use this sweet fabric.


Even though I don't have space for a design wall there was a placement plan for the pinwheel blocks, at first.
After much obsessing, the colors were evenly dispersed and there were no same fabrics in too close proximity. That all went to heck the first row stitched together. I futzed with every row thereafter in reaction to the chaos, and eventually accepted that I really had no control over the outcome. 


Luckily, it turned out darling, and even thought there is an area that swings more concentrated a white contrast, I am pleased with the overall movement and color placement. This is a happy quilt.

IMG_0941

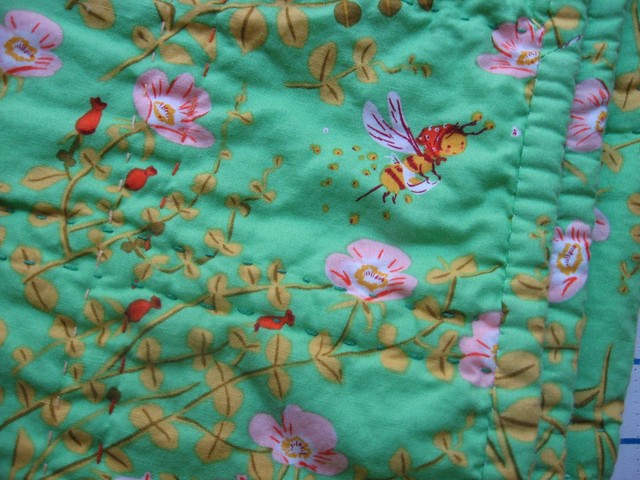
I hand stitched all the quilting lines with 2 strands of variegated DMC embroidery floss. It was what I had lying around and I was happy to use stash materials. The colors are not consistent across the entire quilt, but they are all complementary to the color scheme.


Congratulations Nate and Amanda!

Wednesday, May 7, 2014

An Anniversary Quilt

Once upon a time my Hetero-Life-Mate (awesome roommate) told me about a handmade quilt that had sadly been lost to her through circumstance. Understanding the importance of a cherished quilt, I was sympathetic and filed away in my brain the knowledge that she was definitely "quilt-worthy". 

Fast forward to last year; my HLM and her fiance got married in Asheville (I was a bridesmaid!)  At the time, I didn't have a wedding gift ready for them because, well, I suck at gift giving and hadn't found anything that felt meaningful, or special, or fun enough and I was way pressed for time. 

After the weddings, I had a lot of fun working on the pinwheel quilt and quickly realized that I wanted to make them a quilt too. I could easily picture either of them snuggled up on the sofa with a kitty or two under a colorful quilt, or spread out under a shady tree reading. 

Committed to the idea, then came the question of design/fabric. I knew the quilt should be colorful and bright and beautiful... something that reflected my friend's personality and our friendship.  Eventually, I settled on a mystery quilt kit from Craftsy.com called Blooming Garden for Amy Butler's new egypt inspired fabric line.  The pattern design went together very easily and in spite of a few hiccups, the quilt top was done very quickly.

Now, I'm a bit of a quilting newb, but this quilt had to be special, so I decided that having it professionally long-armed was going to be the best choice for finishing. After googling "long arm quilting service" I found Linda Lovett's fantastic website.  She uses state of the art technology with her quilting machine, blogs the progress of each quilt, and is also located in the same state my friends were married.  I sent her some photos of the finished top and we traded emails, chatted on the phone, and within a few days I sent the top and the pieced backing to her. 

via Linda Lovett
Apparently I did a good job prepping the top and Linda's generously sent my quilt to the top of her queue. (Thank you Linda for helping to make this gift extra special!)

The pantograph I chose is a feather pattern that I felt complimented the grey sparrow backing fabric and has nice movement. In less than a week the quilt sandwich was on its way back to me for the binding.

via Linda Lovett
Back in my hands, I quickly trimmed the quilt sandwich and stitched on the binding. Then I hand stitched the binding closed on the back side and made a label to sew on. 

I love my labels. I also love not doing my homework in favor of hand binding quilts.
And here she is.
It's the biggest quilt I've made thus far!
***Shortly after starting this project I got the terrible news that my friend's beloved dad passed away very unexpectedly. It's a strange and terrible feeling to know someone you love is suffering a profound loss and there is nothing you can say or do to lessen their sadness.  All I could do was try to get the quilt done as soon as possible and send it to her. ***

****HUGS****.
Even though I raced to finish the quilt as fast as possible, I enjoyed the process and am extremely proud of the results. While working on it I took the opportunity to meditate on friendship and family. I think this quilt is beautiful and a worthy gift for my dear friend and her true life-mate. I'm happy to finally send it to them and I hope they enjoy it for many years,


PS. All the finished pics were taken by my buddy Sara!

Sunday, April 6, 2014

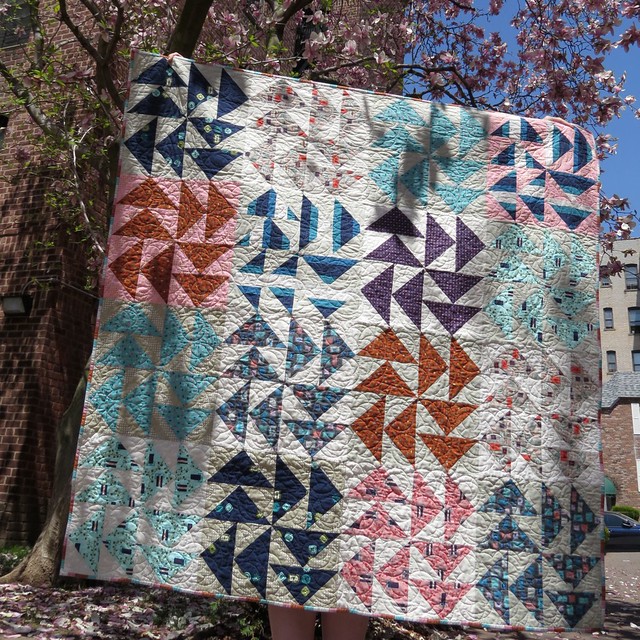
Pinspiration; a Pinwheel Quilt

I should totally being doing my homework right now, but I'd rather share my latest FO.
So, sometime last summer I decided I needed a sewing project that would be the opposite of the wedding dress project. Something using 100% cotton, straight lines only, no fitting issues. A nice, pleasant project... I decided to make a quilt.

I took to pinterest with vigor and was taken by this simple charmer:

http://www.pinterest.com/pin/126452702010497556/

There was no link with the picture so I just used it as inspiration.
I finished the top last fall and then put it away while school and work took over. 
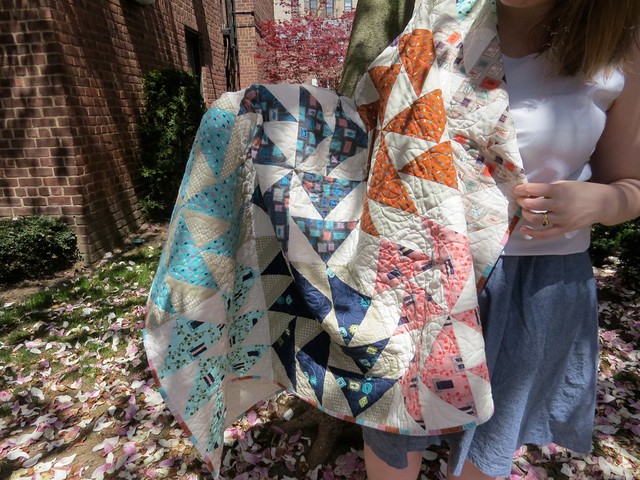
Recently, I've become more interested in quilt making and with more quilts planned I decided to get this one finished in whatever stolen moments I could find. Here is the result:


The inspiration quilt placed the blocks "on-point" but mine are square 
and I left off the outer borders. A nice little lap quilt meant for snuggling up on the sofa under, or draping over your shoulders for a photo shoot. I'm hoping this quilt sees lots of picnics and beaches.


The backing fabric is from a different line that I picked out at The City Quilter on the day that I tested out Bernina Sewing Computers. I ended up buying a Bernina 350 PE and I'm totally in love with the free hand system and the patchwork foot. I see a lot more top sewing in my future, but I digress. 

The batting is 100% cotton and I machine quilted it with my Bernina walking foot which has a handy ditch stitch foot that I used in the ditches of the squares, block seams and diagonals. Quilting was kind of a pain so I think I'll send my next quilt out to be long-armed (but where?) instead. If I had more time I would totally hand quilt my next one, but I'm anxious to have that one finished for a variety of reasons so I think it's a job for the professionals. 

The binding is one of the other fabrics in the line; it's grey with white vintage cameras. I hand stitched the back of the binding to the quilt. The handmade label is a stamp I got at Michaels. 


It's definitely a charming quilt and I am quite pleased with myself. 
I'm certain there will be another quilt finished in my near future, but for now... homework.

Sunday, August 11, 2013

10 Things to Know About Making My Own Wedding Dress (WITH PHOTOS!)

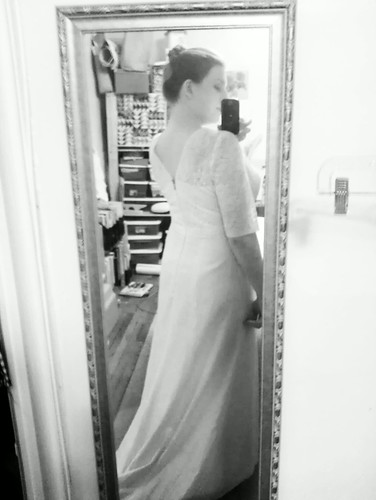
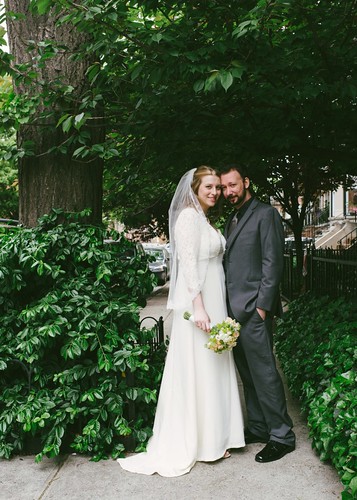
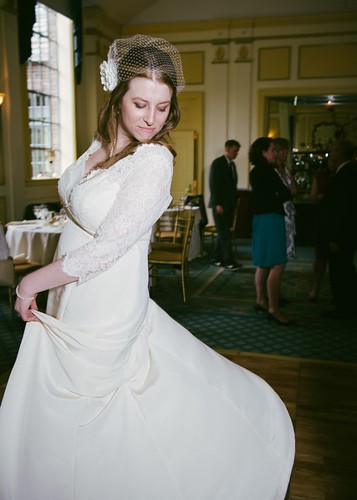
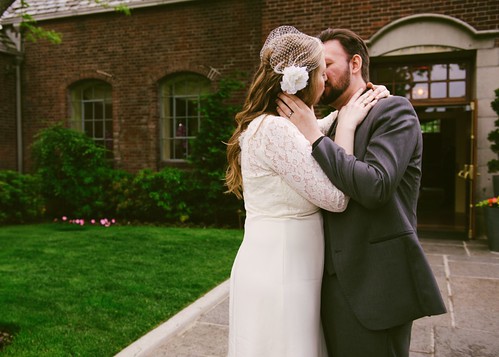
Recently I got married. What that really mean is, I recently had an excuse to make an epic dress for myself. YES,  I MADE MY OWN WEDDING DRESS!  And here are 10 things you might like to know about it.... 


1) Shopping for and trying on RTW gowns was a good idea.

Along with my sister and my MIL, I brought two level headed friends who know me and my personal style well. I tried on 5 dresses at Kleinfelds with the help of their wonderful sales associates and was able to determine which silhouettes looked best on me and I got an idea of what dresses in my “budget” looked like. (The “budget” was 6 times what I planned to spend on materials) This helped keep things in perspective later as I decided on a pattern and purchased materials.

2) I couldn’t commit to making my dress and going to the gym every day.

I decided that having a dress that fits me perfectly was a more reasonable goal than trying to lose 15 lbs and squeeze my chest into a ready made gown. I wish I’d realized this sooner because I would have started making the muslins a lot sooner as well!

3) The design process took a lot longer than expected.

I had a lot of design inspiration and a stack of commercial patterns to choose from. I knew that I wanted a slim skirt with a puddle train, long or ¾ length sleeves and as much lace as I could afford (not much). Originally I thought would combine design details from several patterns but the early muslins where not encouraging. After making muslins for 3 different patterns I was getting a little nervous because I didn’t know what my dress would actually look like. Then at what seemed like the last minute I found a new dress pattern by Simplicity (1909) that pretty much nailed my requirements and I wouldn’t have to change the design at all. I paid full price for the pattern and got right to work cutting a muslin with substitute lace and everything.

4) It helped to have a sewing-savvy friend to be a technical consultant.

My friend Sara is a recent Parsons grad and a knitting buddy. She comes over weekly for TV and wine so she was the perfect person to help me with the fine tuning of the pattern fit and to go with me to try on commercial dresses. She knew precisely what I was going for in style and fit and she knows quite a bit about sewing. It was immensely helpful to have her check in and see the dress progress on a near weekly basis. My coworker Julisa was also able to provide similar advice when needed. I work in the fashion industry as a technical designer and I did most of my pattern corrections and all of my fabric cutting at work on the large cutting tables. Julisa was often there to confirm my layout and cutting methods as well as help fit some of my first muslins.

5) I kept is simple (as much as possible).

I wisely picked a design that would not be a too complicated. It was a fitted but not overly structured design well within my experience level. I think the pattern choice was perfect. I researched couture sewing methods, but I wasn’t afraid to take make time saving choices about construction. There was one point when I started to make it into more of science project than necessary…While shopping for organza at Mood I ran into a coworker who was a contestant in Project Runway Season 10 and specializes in evening gowns. I told him about my plans briefly and asked him if he had any advice. He said something along the lines of “The foundation is everything! Use sew-through boning on your foundation!” Well, a corselet was not an original part of the pattern design, but Susan Khalje and half the wedding dress sewing blog-averse made them so I went ahead and purchased sturdy cotton muslin and all the boning and hook/eye tape I would need, but in the end I didn’t love the restricting fit and it was causing a bit of construction order confusion. Another friend asked if a corselet was truly necessary and wisely suggested that I leave it out in favor of good foundation garments. I took her advice and it got me back on track.

6) DIY Accountability.

While I was working on the actual sewing, I instagrammed pictures on my cell-phone and posted them on Twitter (@restlessgrace) and Facebook. This prevented a lot of repetitive stressful questions about progress and it also garnered a lot of positive feedback and encouragement from friends and family. One of my twitter friends (@FleurHoare) regularly re-tweeted my posts which gave me a boost of confidence and pride. My coordinator Shanelle checked in with me periodically to monitor my wedding planning progress. I could tell she was a little concerned that I was making my own dress, but she was fully supportive and kept me focused on all the wedding details.

7) Making the dress was stressful.

For the last 3 months I almost couldn’t think about anything other than the dress. It was the last thing I though about at night and the first thing I thought about when I woke up. Every wedding nightmare that I had was about the dress not being finished or looking like a hot mess. That it was stressful isn’t really a surprise, but it was something I was in denial about the entire time. I kept a tight grip on my confidence and miraculously I never faltered. I did secretly worry that it would be completed mere hours before the wedding and that it would be a wretched train wreck, but I think having perfected muslin that I could try on anytime that I felt my confidence flag was my saving grace.


I love this muslin!

8) Timing is super important.

I thought that my 10 weeks estimate was a generous amount of time in which to complete it, but I gave myself 14 weeks just to be safe. I finished the dress just 7 days before my wedding! I should have been more disciplined about sticking to my dress making schedule (see above: stress), but since I gave myself a few weeks extra I made it in just under the wire.

9) I saved money making my dress.

Having control of my materials meant I could have a gown in whatever price range I was comfortable with. I kept a spread sheet of my purchases to keep an eye on the mounting cost of the dress. I’m going to be open; I bought $757 worth of materials (including the veil and fascinator materials), but the materials that I actually used in the dress totaled $449. Bottom line; I made a gorgeous silk dress that fits me perfectly for the bargain price of $608 (factoring all dress materials purchased) and a beautiful veil and fascinator that cost $148. For comparison, all the dresses that I tried on were in the $1600~$4000 range (before fitting). There are a lot of materials left over that I definitely will use as well. With the extra silk and lace I plan to make some luxurious lingerie.

10) It was all totally worth it.

Making The Dress was the most satisfying part of planning my wedding. The day of the wedding went by in a fast blur, but I will remember making the dress for a very long time.

Going to Church
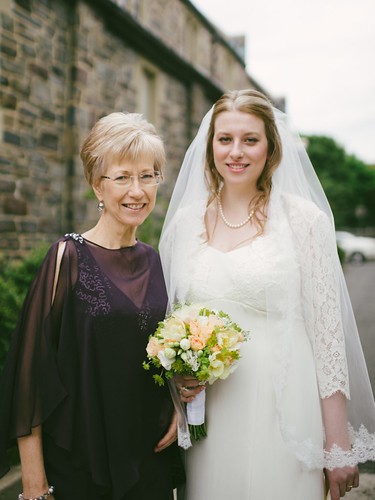
My mom looked so lovely.
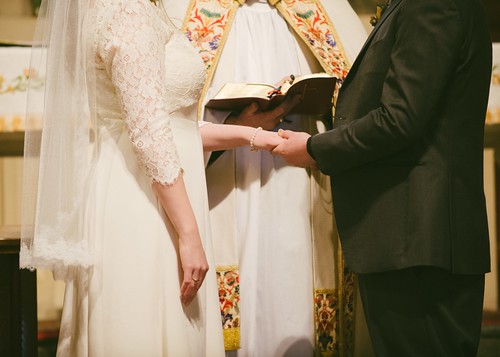
We memorized our vows!
Borrowed my BF's pearl necklace
3 bustle points - ribbons inside

less structure = more dancing!

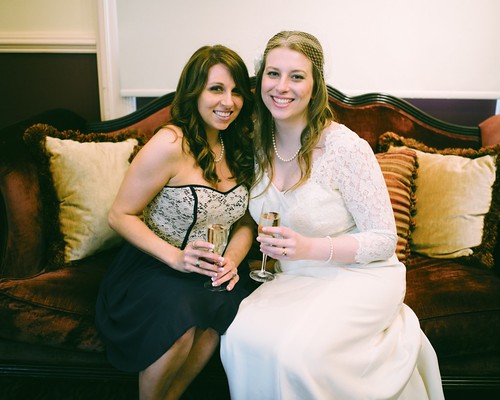
Love

Bonus Fancy Dress Making Tips: 

1. Practice everything, even if you’ve done it before. You want to know what the results will be like this time before you commit to each process.

2. Material is precious and expensive; protect your investment: Do not let anyone else touch your fabric/project. No one knows the financial and emotional investment better than you and no one will take as much care with your fabric as you. Clean your sewing room and don’t bring the dress outside the room!

3. You risk marring your fabric with excessive handling. When using silk crepe, test press a square of your silk with dry heat to see if it shrinks. If it doesn’t, consider skipping a pre press.

4. Press well and often. This is no time to skimp. Cover your ironing board with clean muslin. Better yet, also cover the ironing board legs with clean muslin. If your organza press cloth somehow got fusible glue on it from a previous project, don’t use it! Test the heat setting so that you don’t get seam impressions.

5. Sewing hook and eye tape is easy! There is a great tutorial here.

6. Just because Susan Khalje does it in her couture wedding dress book doesn’t mean you have to. In other words, a corselet is not necessary if the dress is not strapless and doesn’t have a heavy skirt.

7. Stay organized. Keep all your notions together, eliminate extra stuff on your sewing table, and keep all the muslins together and all the pattern pieces together. I spent an hour hunting for my modified pattern pieces one night, terrified that I’d thrown them out.

Extra: My wedding pinterest board with all my wedding inspiration pins.

Stay tuned for the epic wedding dress making detail post!

Related Posts Plugin for WordPress, Blogger...