It has take me a LLOOOooooong time to get around to writing about the details of making my wedding dress. This post is not quite as detailed as I'd like (ahem) and ends rather abruptly but I'm a sewist, not a writer and this post is past due so get a drink and settle in, this is a long one with lots of photos & links.
So... exactly how did I go about making my wedding dress?
Lots of research and planning followed by lots of work!
Planning
Major Design References and inspiration:
The elements that I wanted most were lace and sleeves. I was going for a traditional, vintage look so pouffy and strapless were out. Favorite designers were Claire Pettibone, Temperly London, Jim Helm, Carolina Herrera (Twilight, Bella’s wedding dress), Kate Middleton (the lace bodice w/ sleeves), Dolce and Gabanna, and of course a million pins on pinterest. Rather than repost a bunch of inspiration pics, just go check out my pinterest board if you are so inclined.
Patterns I considered
Kwik Sew: K3401
Simplicity: 1909
Musin Making
 |
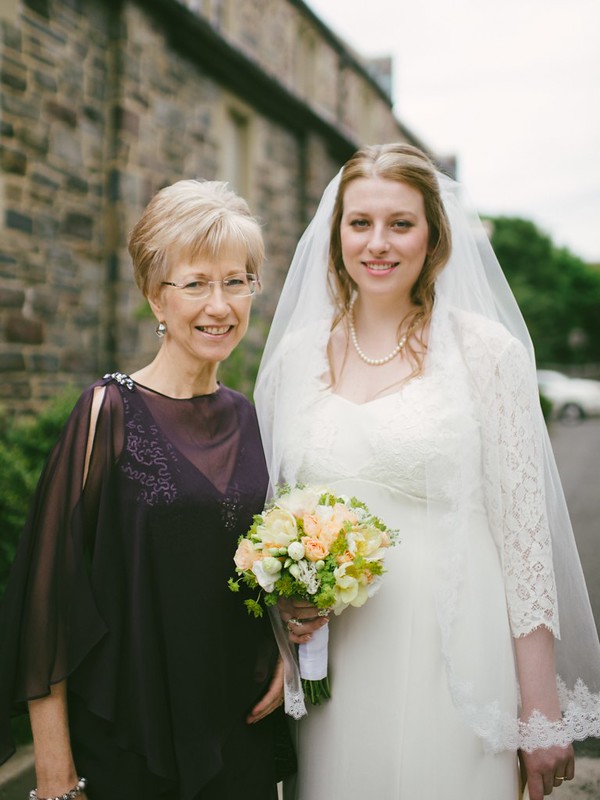
| Simplicity 1909, the clear winner of the muslin stage. |
 |
| The Result |
Materials
Fabric Shopping
Chic Fabrics – Silk Charmeuse lining, Cotton Batiste and Cotton Muslin.
 |
| My home away from home. |
Lace Star / Fabric & Fabrics - Silk crepe for the body, gorgeous alencon lace. This place has a fantastic selection.
 |
| This is the lace I chose. It was the single most expensive part of the dress. |
Mood Fabrics NYC – Silk Organza for underlining the bodice
Lennox Fine Fabrics - Silk Rayon Illusion Tulle (for the veil). 108” wide, 1.5 yards. I cut it down to 75” wide, which I think it may have been a little too wide.
Trim Shopping:
 |
| Top Trimming - one of my new favorites |
Daytona Trim for Lace (for the Veil), and ribbon for the bustle.
 |
| I am so very in love with this lace and I've got like 9 yards extra! |
Pany Silk Flowers in the Flower District where I found the silk flower for my fascinator.
Manhattan Wardrobe Supply for a padded satin hanger and wedding dress garment bag.
Construction Research
 |
| My favorite sewing reference books |
Susan Khalje’s Couture Wedding Dress (not pictured) – I bought the CD, but I really didn’t like reading this as a digital book. The focus is on the specific construction employed in the example dresses (one of which I got to see at the Mood lace seminar). It isn’t exhaustive and doesn’t explain many alternate methods. It’s a good book, but I needed other references for my specific dress.
Reader’s Digest Complete Guide to Sewing – My old college standard and in my opinion, any edition of this book should be on every sewist's bookshelf. I also have the Complete Guide to to Needlework and I freaking LOVE it.
Vogue Sewing – this one is pretty good, but I usually look here to see if it differs from the Singer Sewing Book.
Couture Sewing Techniques by Claire Scheaffer, obviously.
Sewing Specialty Fabrics - Singer Sewing Reference Library - I collect this series; it's great!
Claire Shaeffer's Fabric Sewing Guide - this is a great reference for all construction options for specific types of fabric. I relied on it a lot.
Singer Sewing Book by Mary Brooks Picken – This is my favorite vintage sewing reference book. It also has a nifty logo that I think would make a great sewing themed tattoo.
 |
| Sewing Tattoo perhaps? |
Craftsy: The Couture Dress (Susan Khalje) – excellent, I highly recommend it especially for the muslin making and the finishing touches.
Craftsy: Vintage Inspired Veils for the Modern Bride (Doreen Vandermeer). Pretty useful for the materials and techniques, but I had to go it alone for the lace application on my veil. I searched ALL FREAKING OVER for a flower that was nice enough to use on the fascinator but low end enough that it could be taken apart and reconstructed. Details on that in a future post (but no promises).
Mood Sewing Seminar: Lace (Susan Khalje) – I am SOOOO glad I was able to ask Susan some specific questions about choosing a lace and construction methods. She went over the specific types of lace and their applications. Susan also talked me into buying her book on CD and I got to chat with some of my favorite bloggers Daughterfish, Oonaballoona and Marina.
 |
| Susan Khalje at Mood |
Construction Details
I cut out all my muslins, the silk crepe and the silk charmeuse on the large cutting tables at work. I used a bunch of cheap lightweight cotton muslin as a bottom layer to sandwich the silks between (muslin/silk/pattern) which helped prevent slipping and keep the fabric grain straight.
 |
| Serrated scissors, fabric weights and lots of space. |
 |
| Cutting the charmuese lining |
 |
| The seam treatment on the right wins |
I sewed and hemmed the skirt pieces before assembling them with the bodices.

 |
| Machine Blind Hem - not very couture, I know. |
 |
| Pressed Blind Hem - with lace hem tape |
 |
| Silk Organza Bodice Underlining - glass head pins and serrated scissors |
I cut the lace over bodice at home so that I could lay out the pattern pieces and ruminate on it for a while before committing to cutting.
 |
| The pattern layout diagram wasn't very descriptive. |
 |
| Aligning the scallop valley with the shoulder seam-line. |
 |
| I left myself plenty of margins for overlapping motifs |
I then thread traced the pattern pieces with blue thread.
 |
| Working at night makes for crummy instagrams |
 |
| Thread traced seam allowances and notches |
 |
| Front bust dart & planned cut line |
 |
| side seam allowances pressed open and catch stitched |
 |
| Armholes bound with bias silk organza |
 |
| Dart test swatch with lime green catch stitches |

With time running out I made a list of all the last steps and got real busy crossing them off!
Before attaching the bodice lining to the skirt lining I inserted 1/8” wide satin ribbon at the side seams/empire seams for hanger loops. I tested the length out on the padded hanger that I bought for the dress. I wanted the loops to both hang around the hook of the hanger.
The lace over bodice to the crepe under bodice at the empire seam.
The bodice lining is attached to the bodice at the neckline edge. I machine lock stitched and under stitched the seam allowances toward the lining.

I hate installing zippers as a general rule, but sewing it by hand with the best materials was such a pleasure.
 |
| hand picked zipper application |
 |
| Silk thread, hand picked zipper |
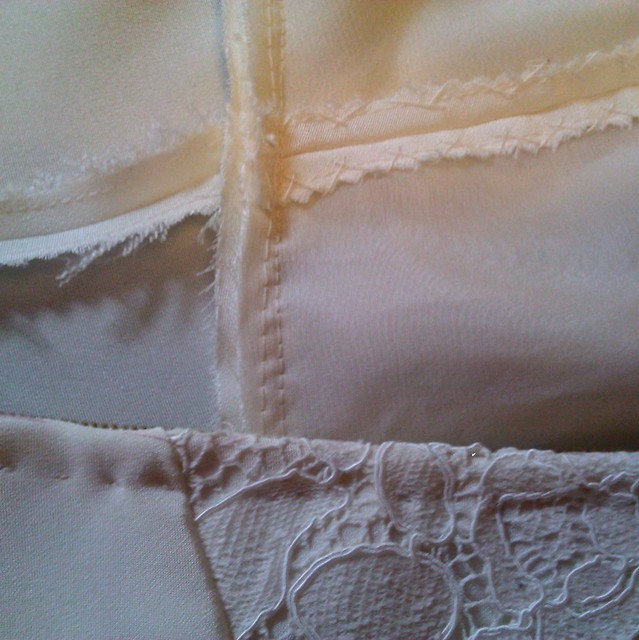 |
| Here you can see the bodice seam allowances catch stitched to the organza underlining. |
Then I fell stitched the charmuese lining to the zipper tape on the inside, and a gold hook and eye at the top finished the top edge.
 |
| Charmuese lining is so lovely. |
 |
| My Zipper is so pretty! |
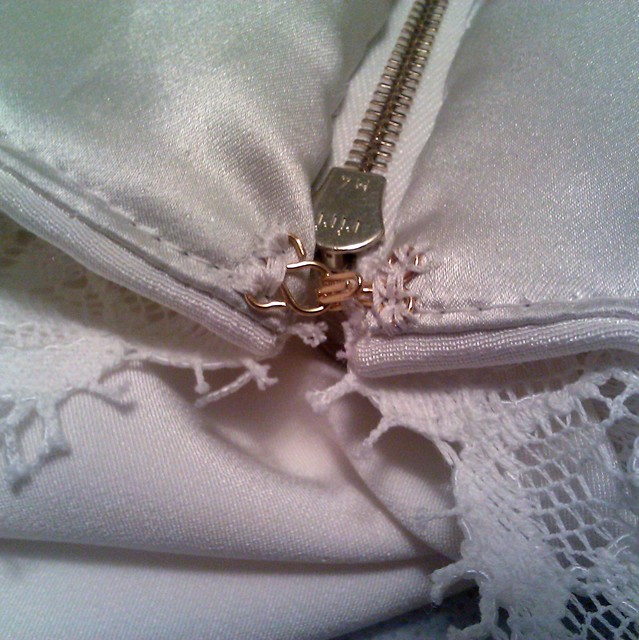 |
| Gold hook and eye - my stitching is not so great though. |
For finishing touches; I tacked the under-bodice to the lace over bodice at the side seams near the top of the under-bodice; I made thread chain stitch carriers for the straps at the front empire seam and at the shoulder seam to ensure that the straps wouldn’t peak out from the lace. This also helped prevent the lace from slipping off my shoulders.
One final fitting (thanks Sara!) to decide on the bustle points and I then took 18 hours to decide between buttons or hooks; at the last minute I went with ribbons instead because I decided I didn’t want anything visible on the outside and I also saw a great tutorial on You Tube on how to use them.
The fascinator and veil were the very last things that I did (day before the wedding). I worked on the fascinator on the afternoon before the rehearsal and I made the entire veil, from start to finish between 10 and 12 pm after the rehearsal dinner. I may blog about them eventually, but I posted about those projects on my craftsy page so you can check it out there for now.
And that is the end of this post for now. I may edit to add more photos or additional details later.
Let me know if you have questions!
 |
| Thread loops at the shoulder seam to hold the straps |
 |
| Hook or button? How about neither?! |
The fascinator and veil were the very last things that I did (day before the wedding). I worked on the fascinator on the afternoon before the rehearsal and I made the entire veil, from start to finish between 10 and 12 pm after the rehearsal dinner. I may blog about them eventually, but I posted about those projects on my craftsy page so you can check it out there for now.
And that is the end of this post for now. I may edit to add more photos or additional details later.
Let me know if you have questions!


