This past spring I took a textile painting class at FIT. I didn't get a chance to steam my last project because I painted it on the last day of class, so when I had a chance (read: needed a break from knitting my Mesh/Rib Pullover) I steamed it at home in my kitchen. This is much more involved than it would have been in class, primarily because our kind TA did all the work for us.
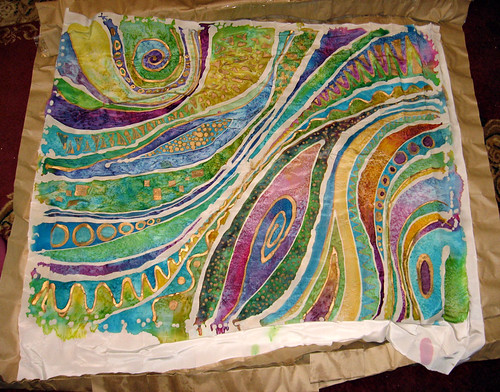
Taken in class while painting.

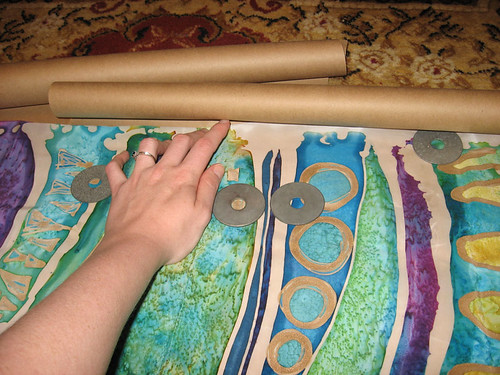
Rolling the painted silk in brown craft paper. Craft paper was purchased at Duane Reade. Blank newsprint would work fine also.
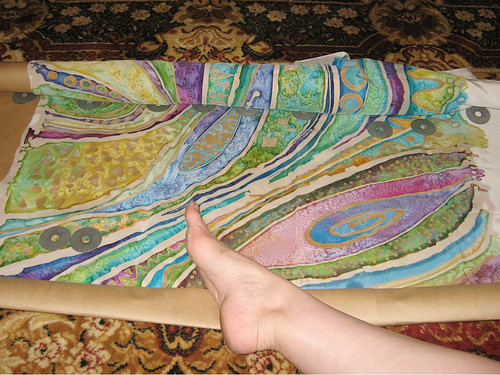
The craft paper wasn't very wide so I had to use 2 pieces over lapped. It was also very curly so I had to use my handy washer weights, my 2 hands and a foot. (I'm impressed that I was able to capture this moment on camera.) I left about a foot of paper at the end (center of the roll) to fold back over the inside edge of the fabric. I was careful to smooth out the fabric as it was rolled so that there won't be any wrinkles or dye transference.
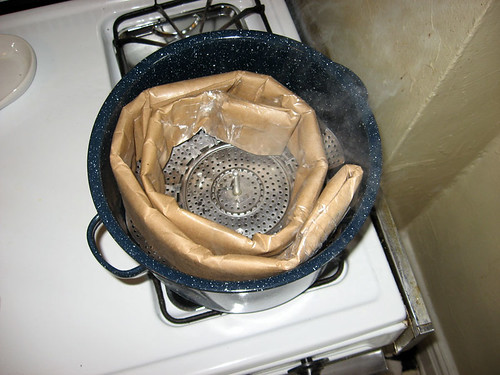
Taped up the seam and the ends. It is important that the paper is permeable to the steam, and there is nowhere for water to splash directly onto the fabric.

I used this old stock pot (that I use ONLY for dyeing) filled about 2 inches with water, and placed my steamer on top of a shallow baking tin for additional lift. Once the water started to boil I coiled my paper wrapped silk and fit it gently in the pot, and was cautious to avoid splashes. I reduced the heat to low, and let steam for 2 hours.
I put a folded kitchen towel under the lid to prevent the condensation from dripping back onto the paper which could cause water marks if water seeped through onto the silk.
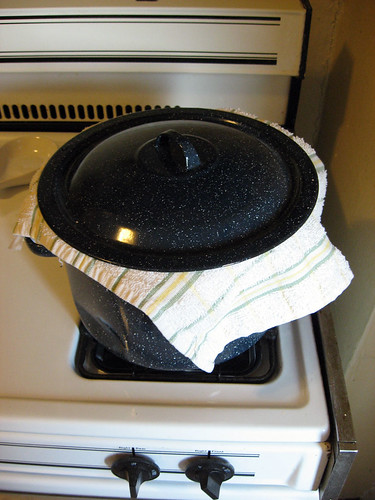
I think I did get a water mark or two because in the end the kitchen towel touched a small portion of the paper... but since my painting style is watery and I used some cool salt blending techniques it is hard to notice the spot and it doesn't really look like a mistake. I learn by doing and messing up anyway!
After steaming, I washed the painting in cold water to remove the excess dye. The most important thing I learned from my first project (not shown) is that the fabric/silk must dry so that it does not touch itself. Even when the water runs clear and it looks like all the dye is out, this is very important to avoid dye transference. It was kinda tricky to rig this set up in my bathroom so that the entire piece of fabric touched nothing but the clips. Luckily, silk dries very fast.

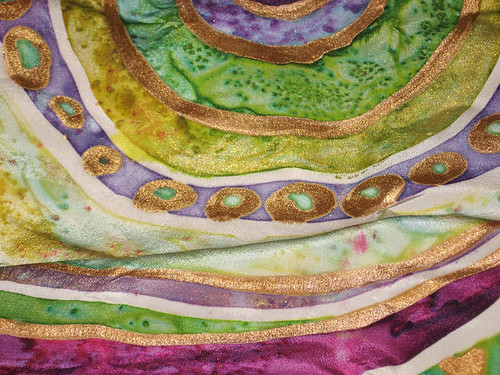
Some lovely details.

In case anyone wonders, I was inspired by the Gustav Klimt exhibit at the Neue Gallery - the Adele Bauer-Bloch painting in particular. I think the show is over now... but if it's not, I do recommend seeing Klimt paintings in person. There is a depth of texture in his paintings that simply cannot be seen in a photograph.
I used clear wax batik and gold Jacquard gutta resist, Senelier dyes, and a whole lot of kosher salt. I'm a bit of a control freak and I usually pre-plan projects, but since this was the last day of class I decided I needed to take advantage of the lab time and exercise my right hemisphere. There are things that I like and don't like about this piece, but it was good to get it done fast because I learned a lot that I can use next time.
5 comments:
this is so cool!!
I would love to learn how to paint textiles...maybe when I move back to NYC I'll look into the one you took.
Another reader! Yay! Thanks Mona!
Yeah, part of what I love about living in NYC is the proximity to some of the best art schools, and FIT is public so it's easy to take classes. I want to take the machine knitting class next.
Yummy, makes me want to roll around in it. (Is that weird?)
our a genius...this is brilliant!!!
oh this is just gorgoeous.
well done !!!
Allison :-)
Post a Comment